Build a quest
Description: Introduce an objective, wait for player progress, and complete the quest.
A quest graph introduces objectives and updates them as the player makes progress. This tutorial creates a small quest with one objective, a condition that waits for the game, and a successful ending.
In this quest, Mira Thorne has lost her ledger on the mountain road. The player must find it before the quest completes.
Tutorial project. Download the project to follow these steps.
Open create_quest to begin. The create_quest_final project contains the completed result.
Open the graph view
Select Quests & Dialogues in the left sidebar or press ⌥2.
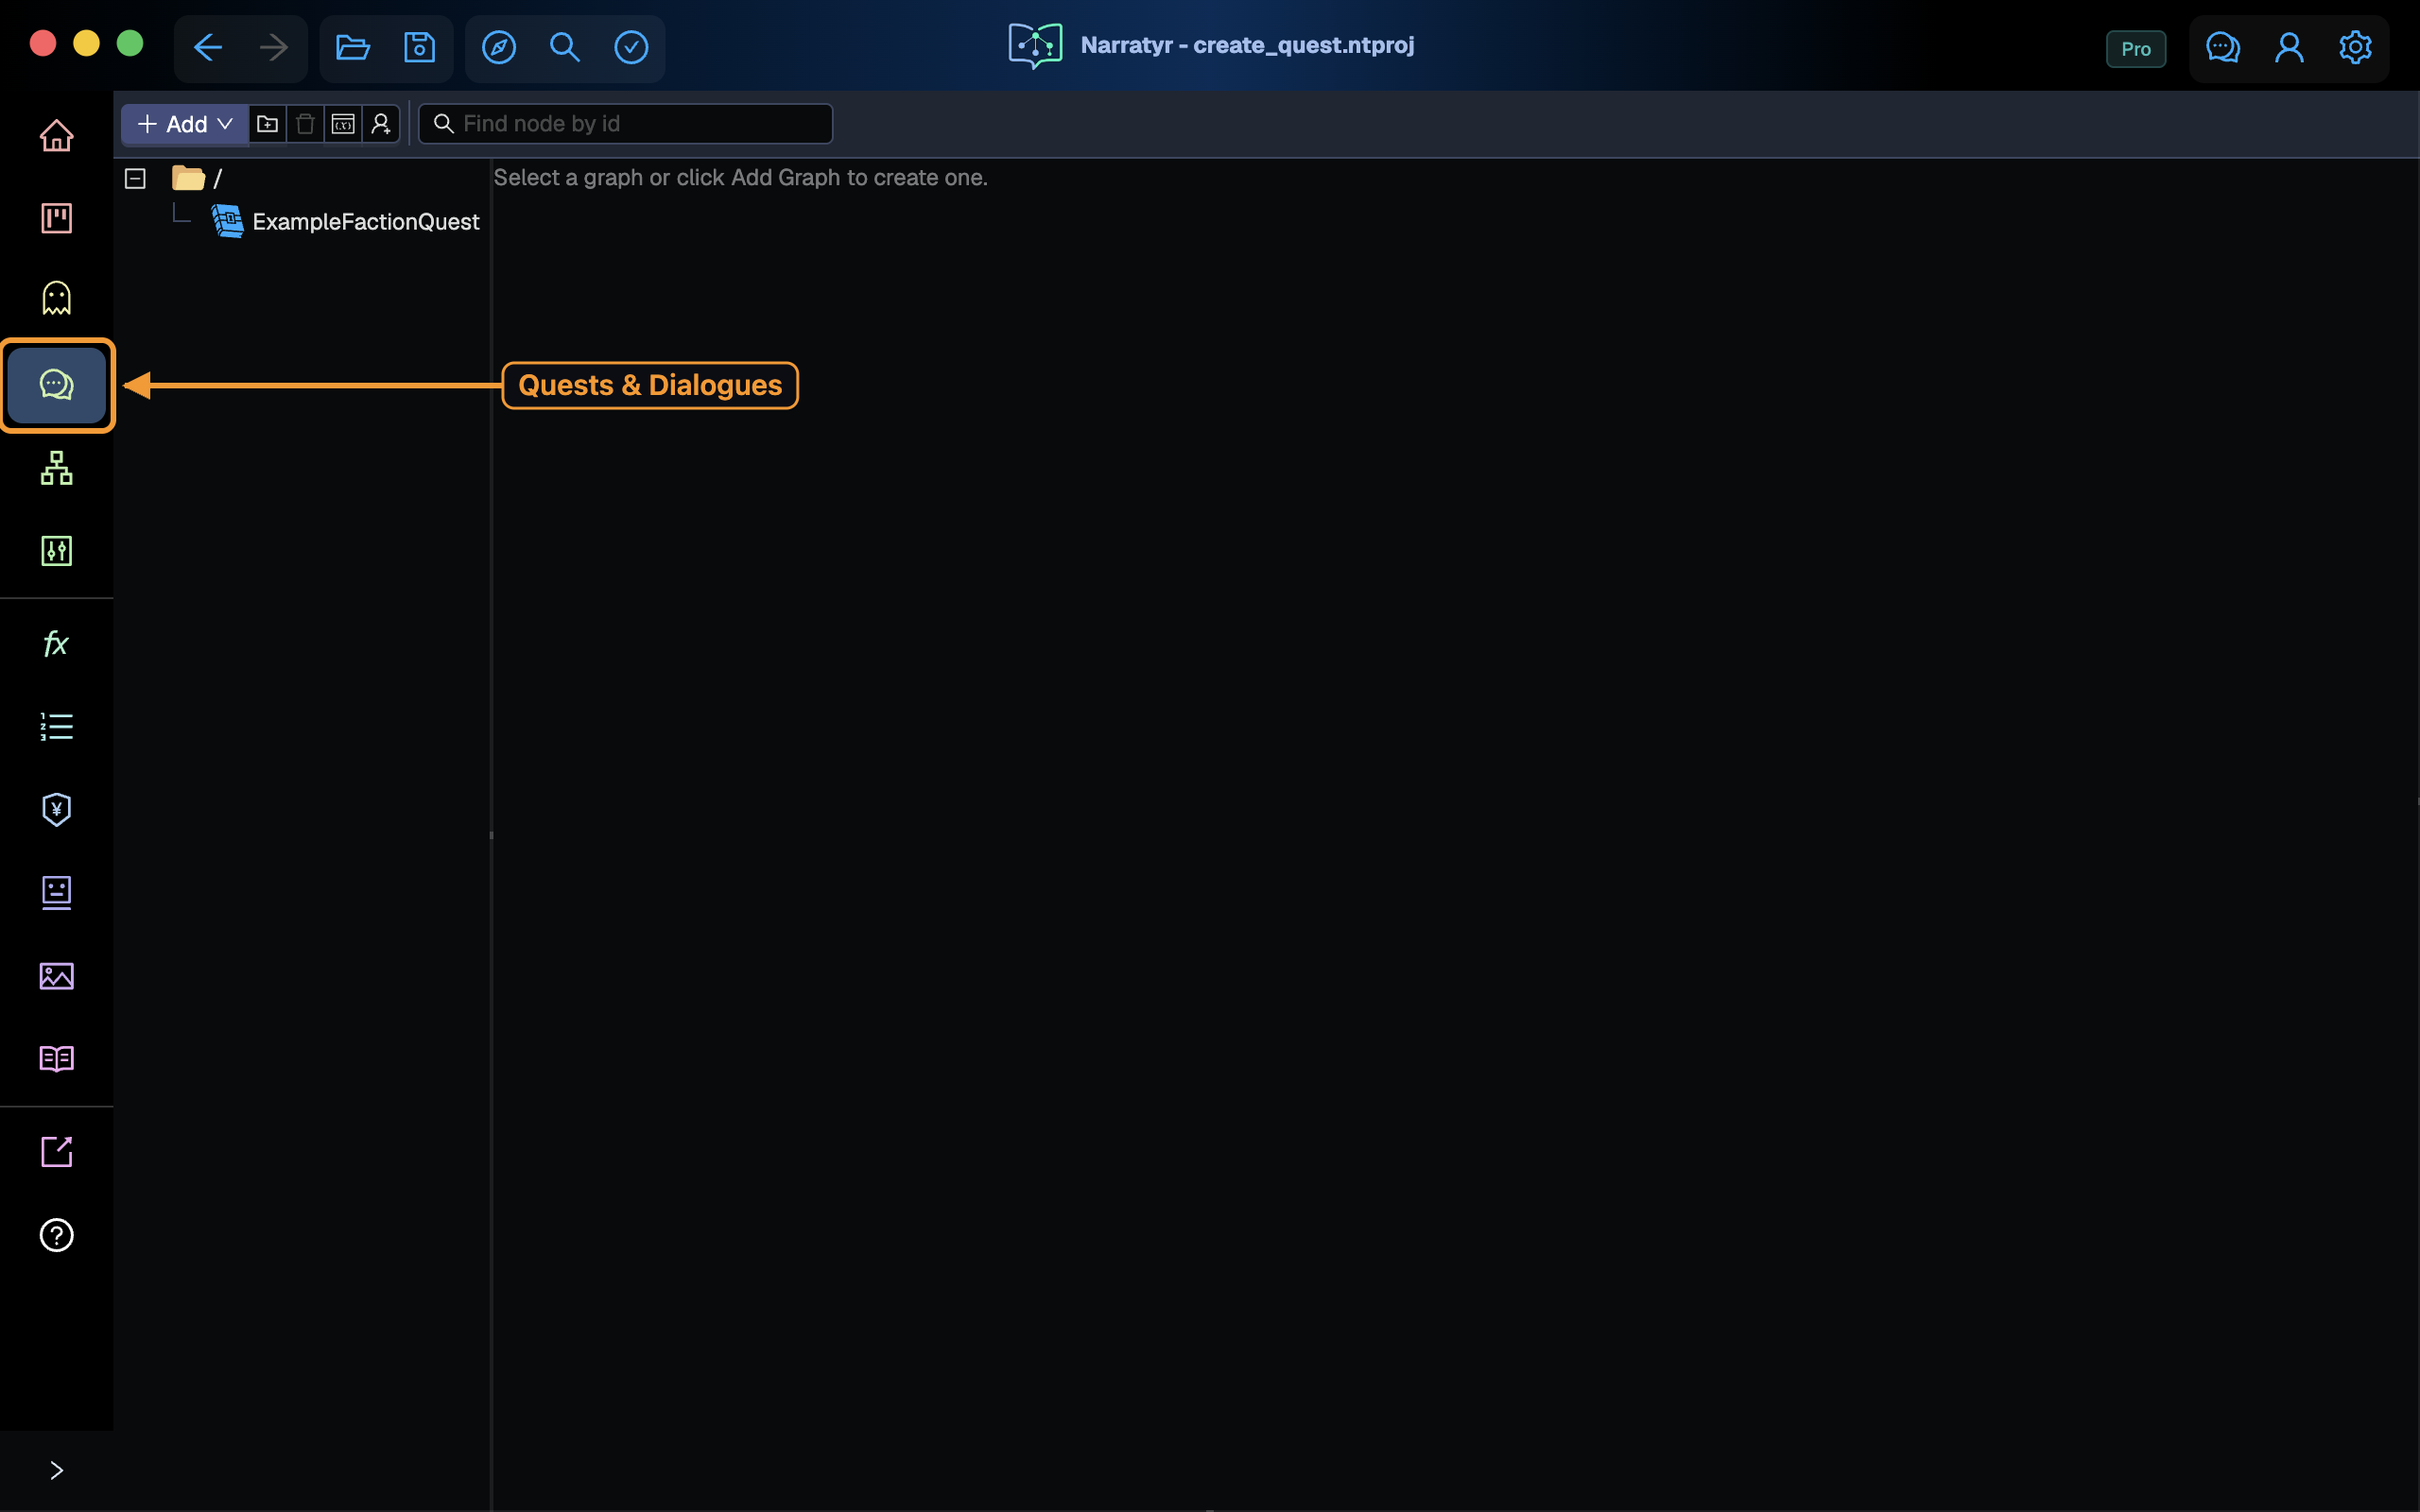
The left panel lists graphs, the middle panel contains the canvas, and the right panel shows properties. Most quest node settings appear in the properties panel.
Create and name a quest
Select Add in the toolbar, then choose Quest.
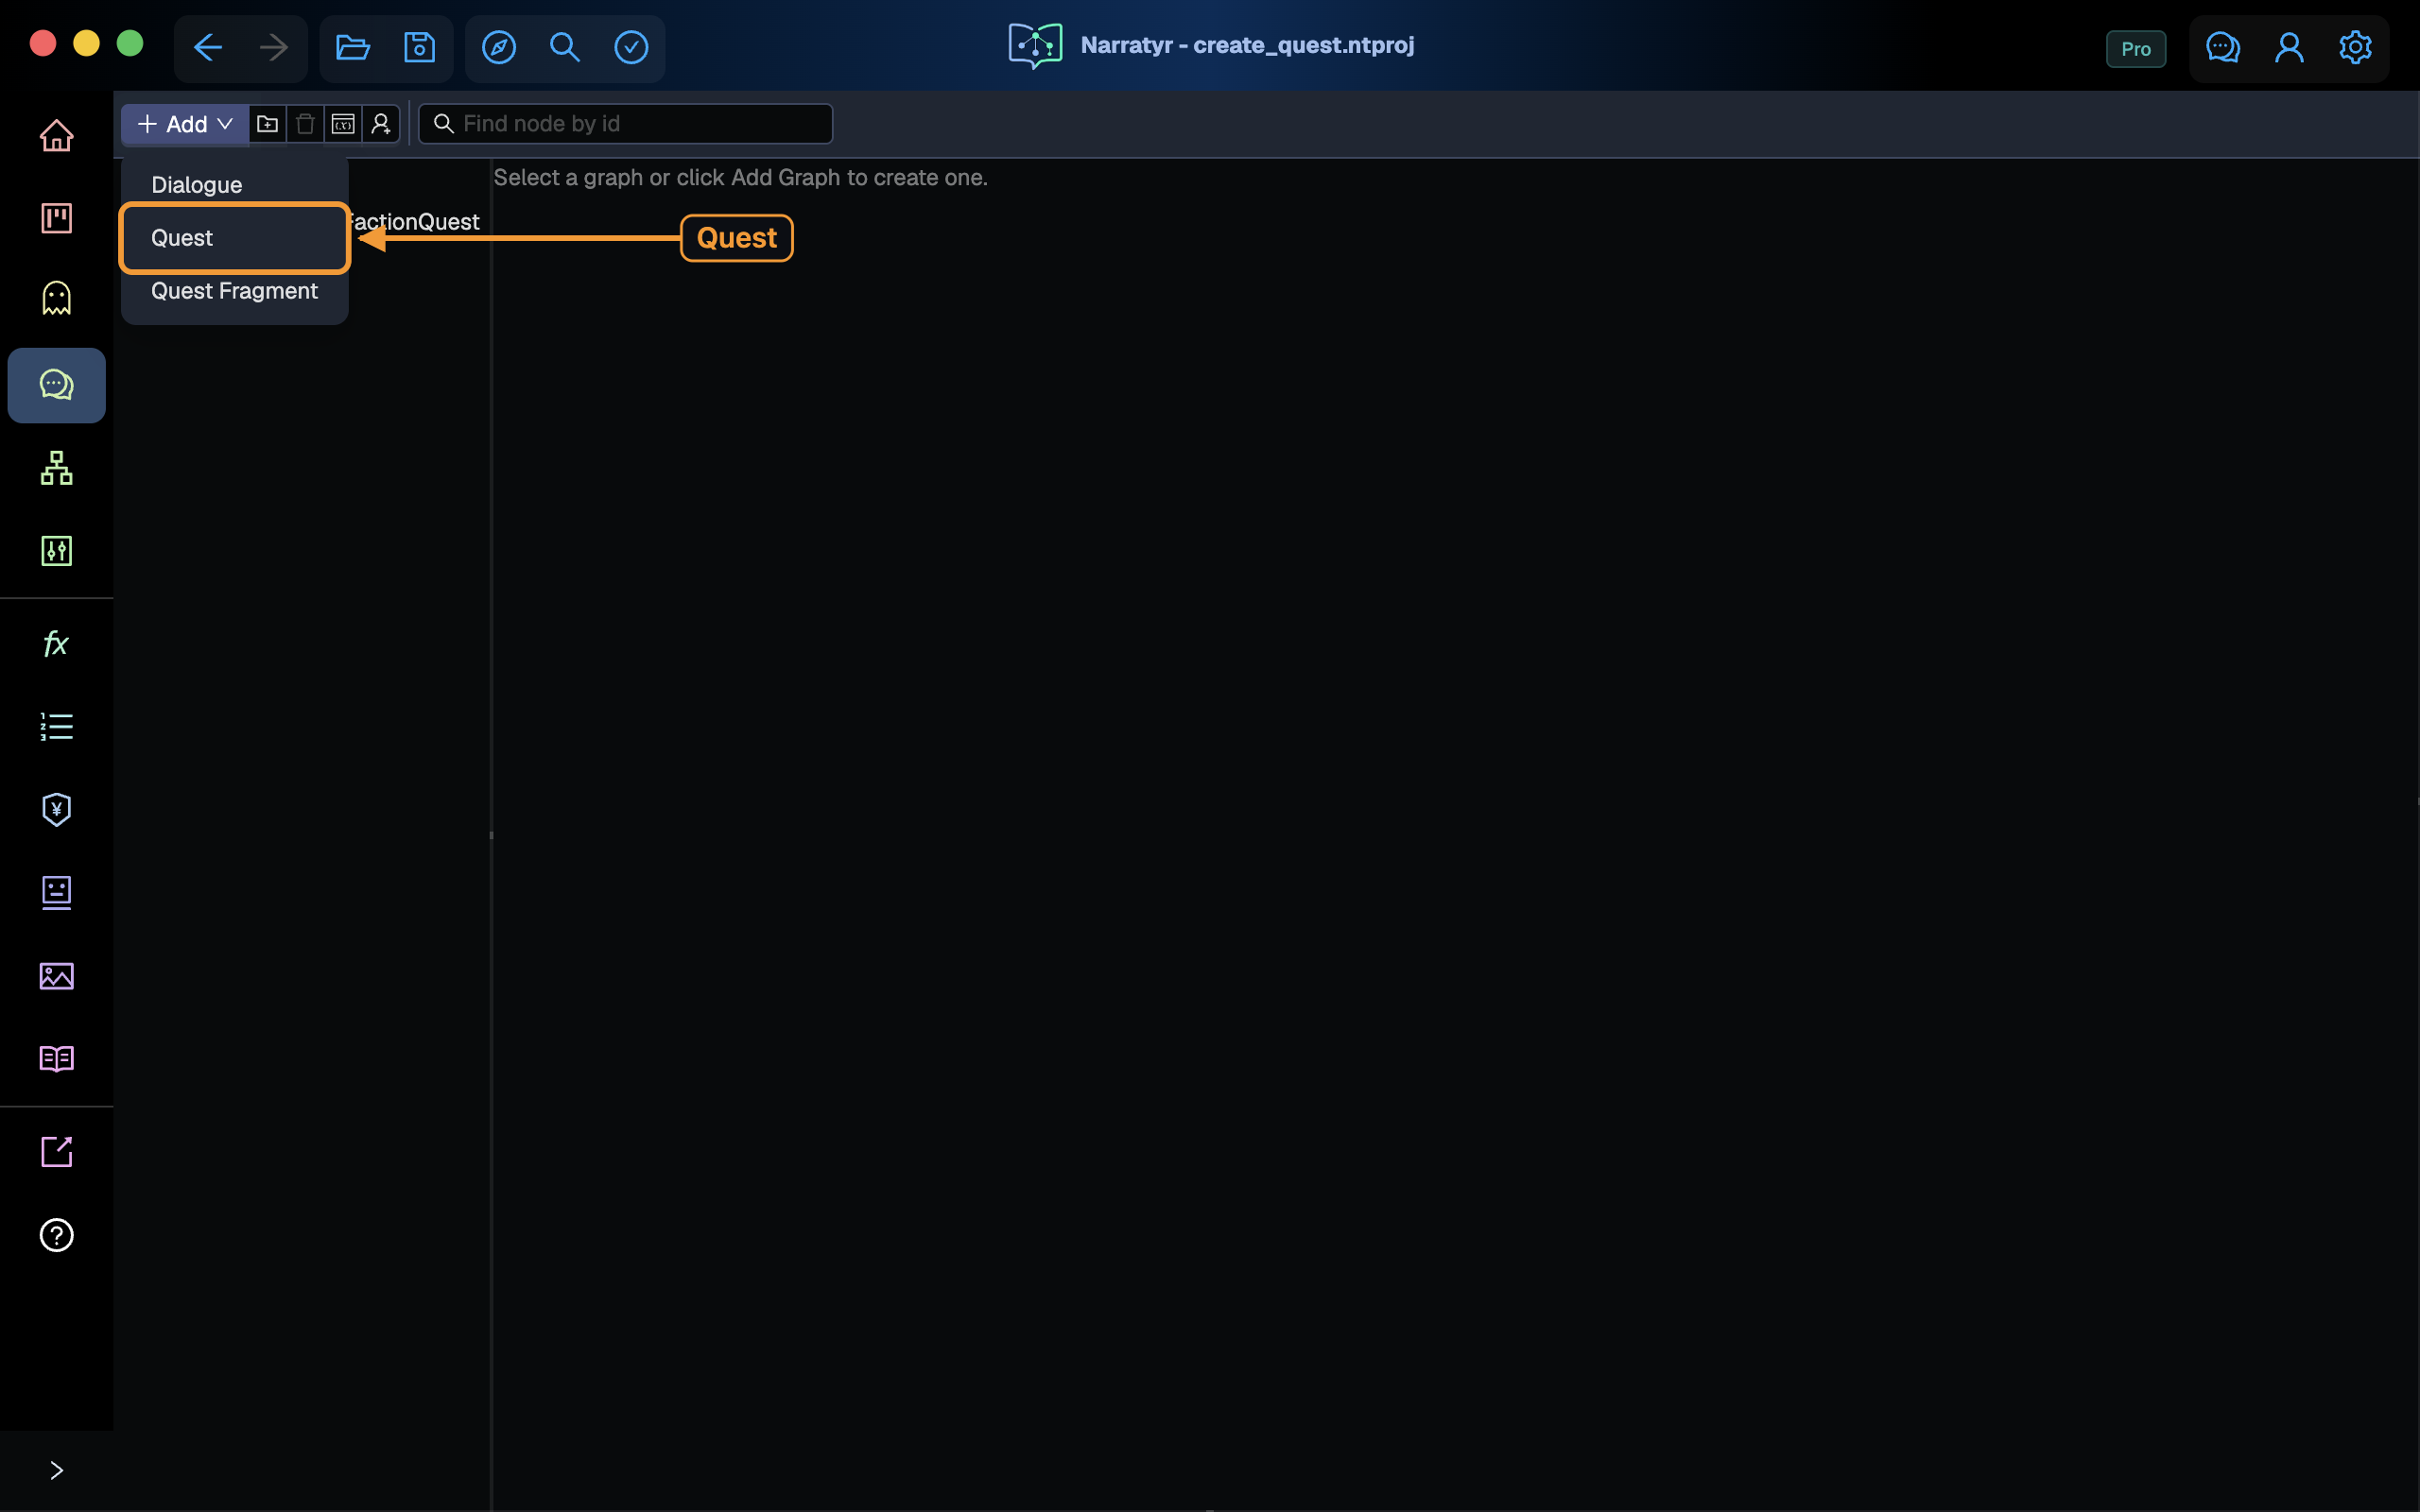
Enter LostLedger for the new graph name and press Enter.
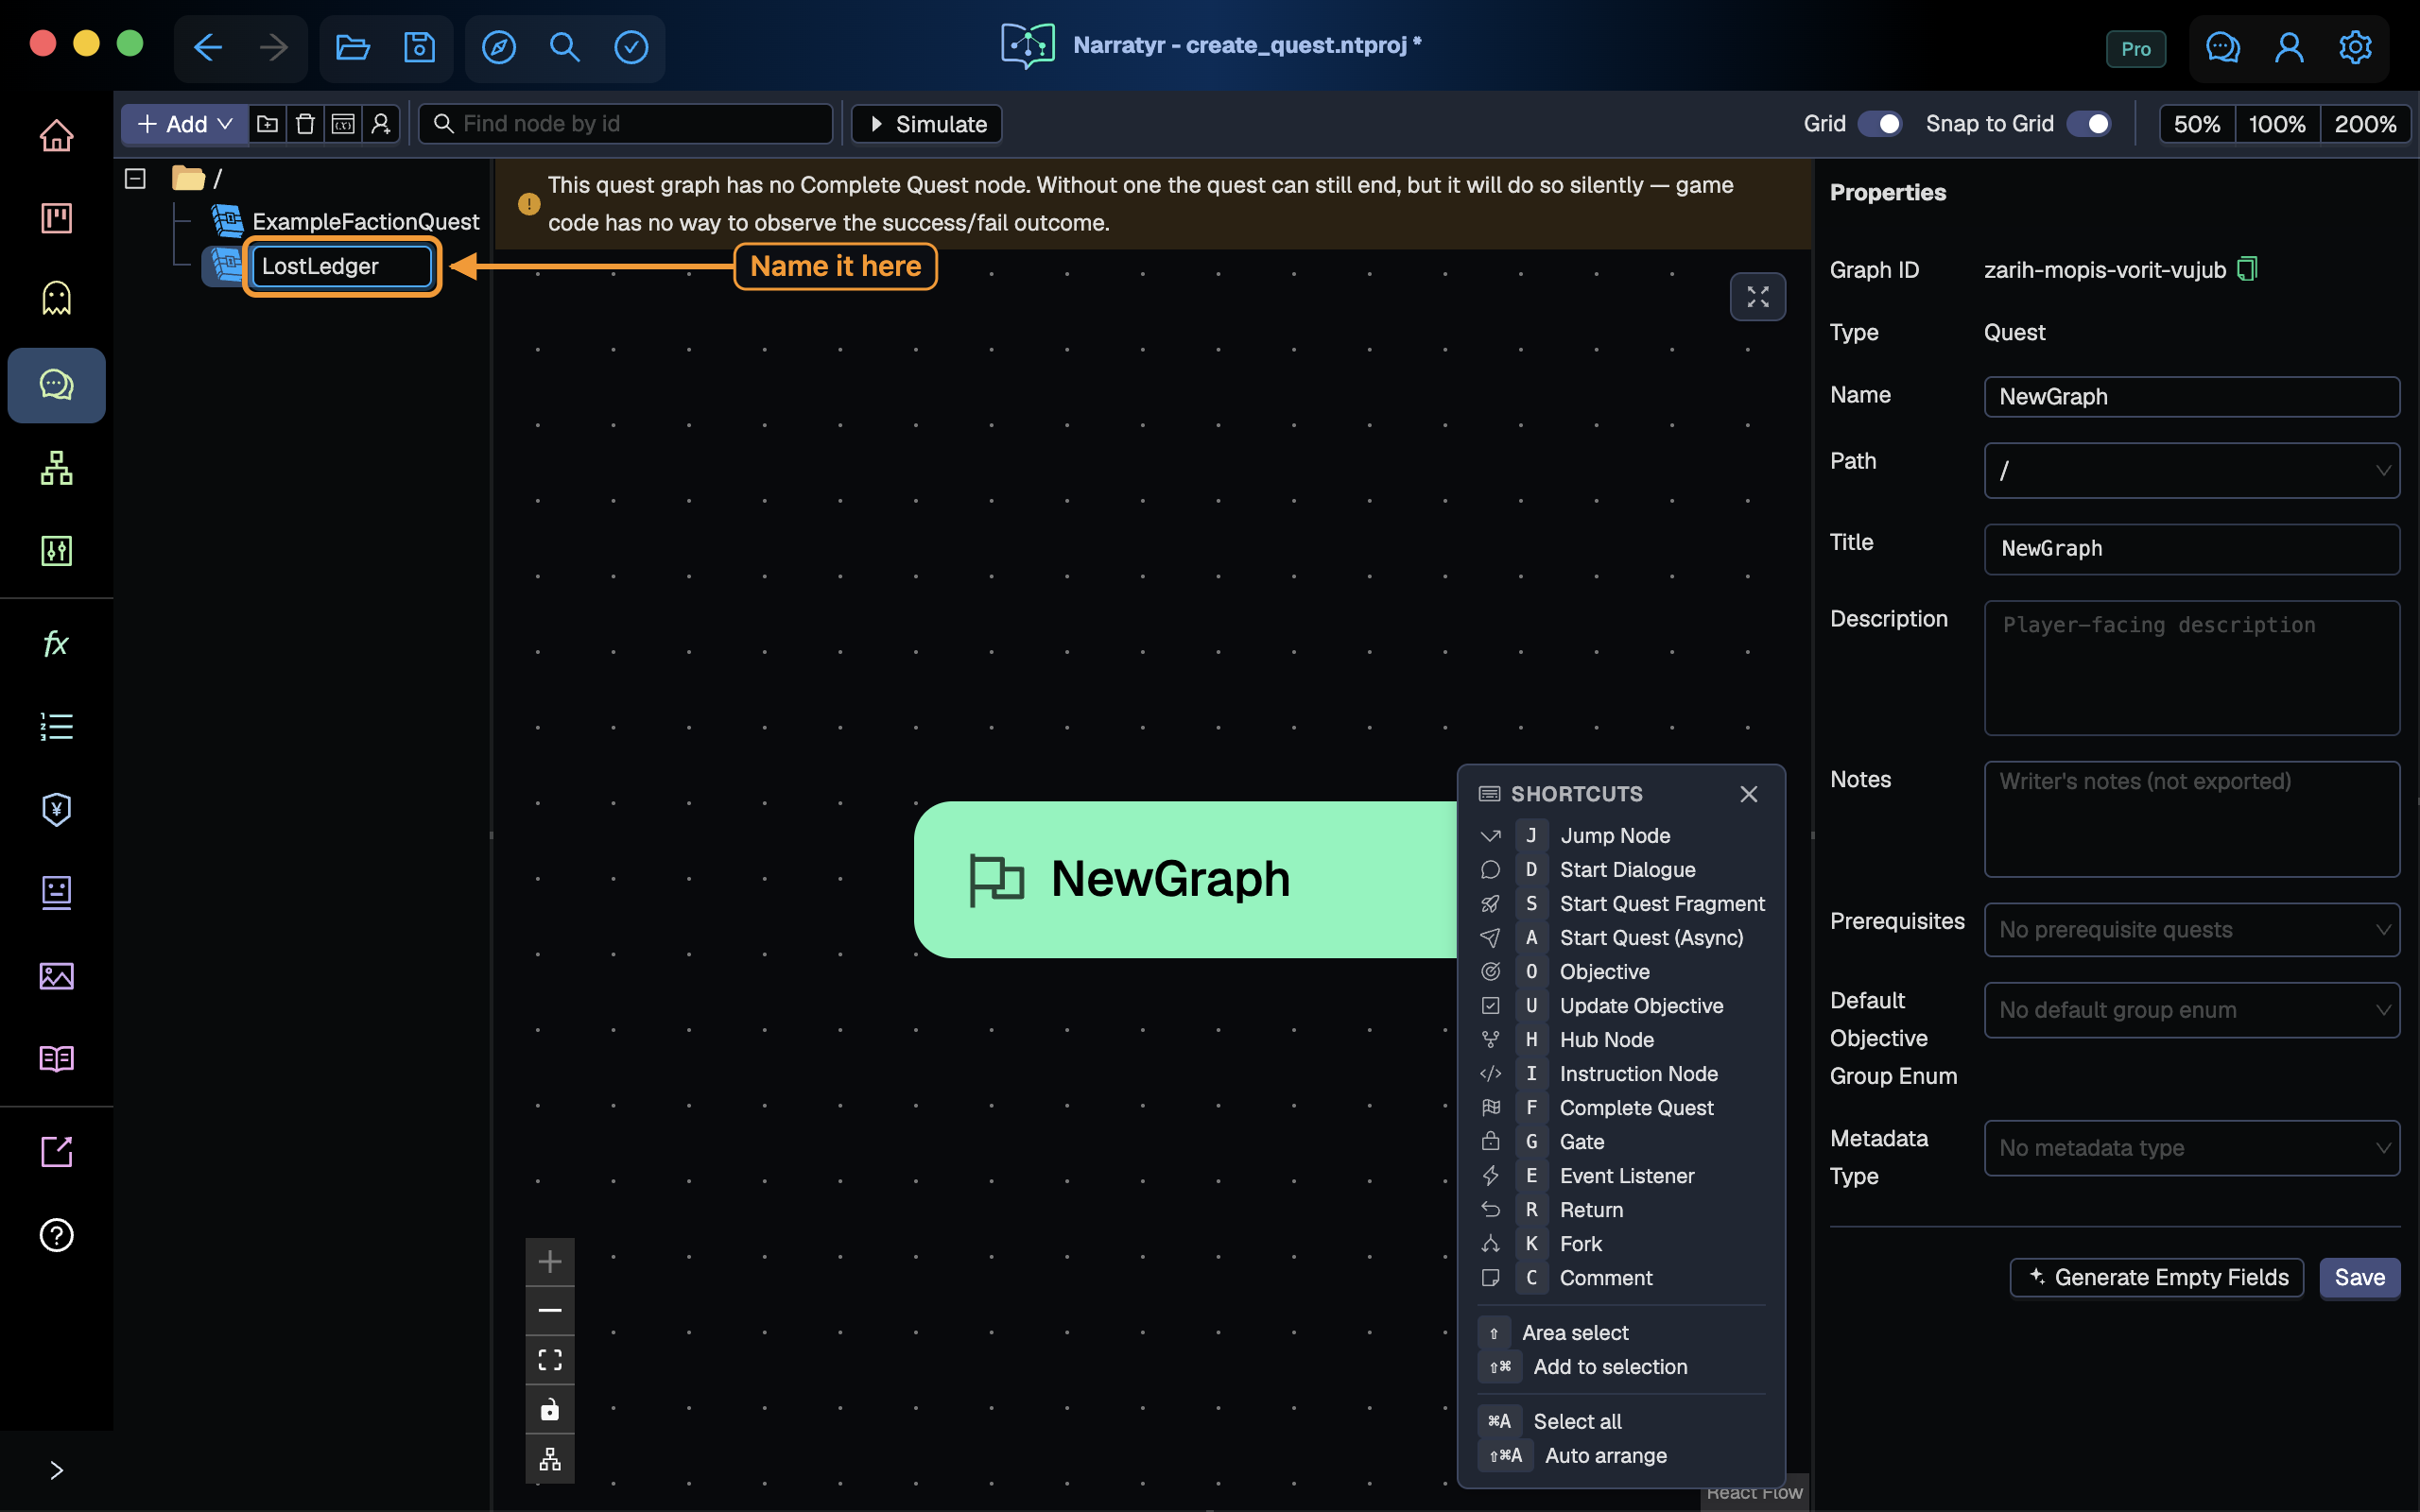
Game code uses this name as the quest identifier. It can contain letters, numbers, and underscore characters without spaces.
This tutorial doesn't need a Quest Fragment, which moves part of a larger quest into another graph.
Add a title and description
Clear the canvas selection to edit graph properties. Enter the Title and Description.
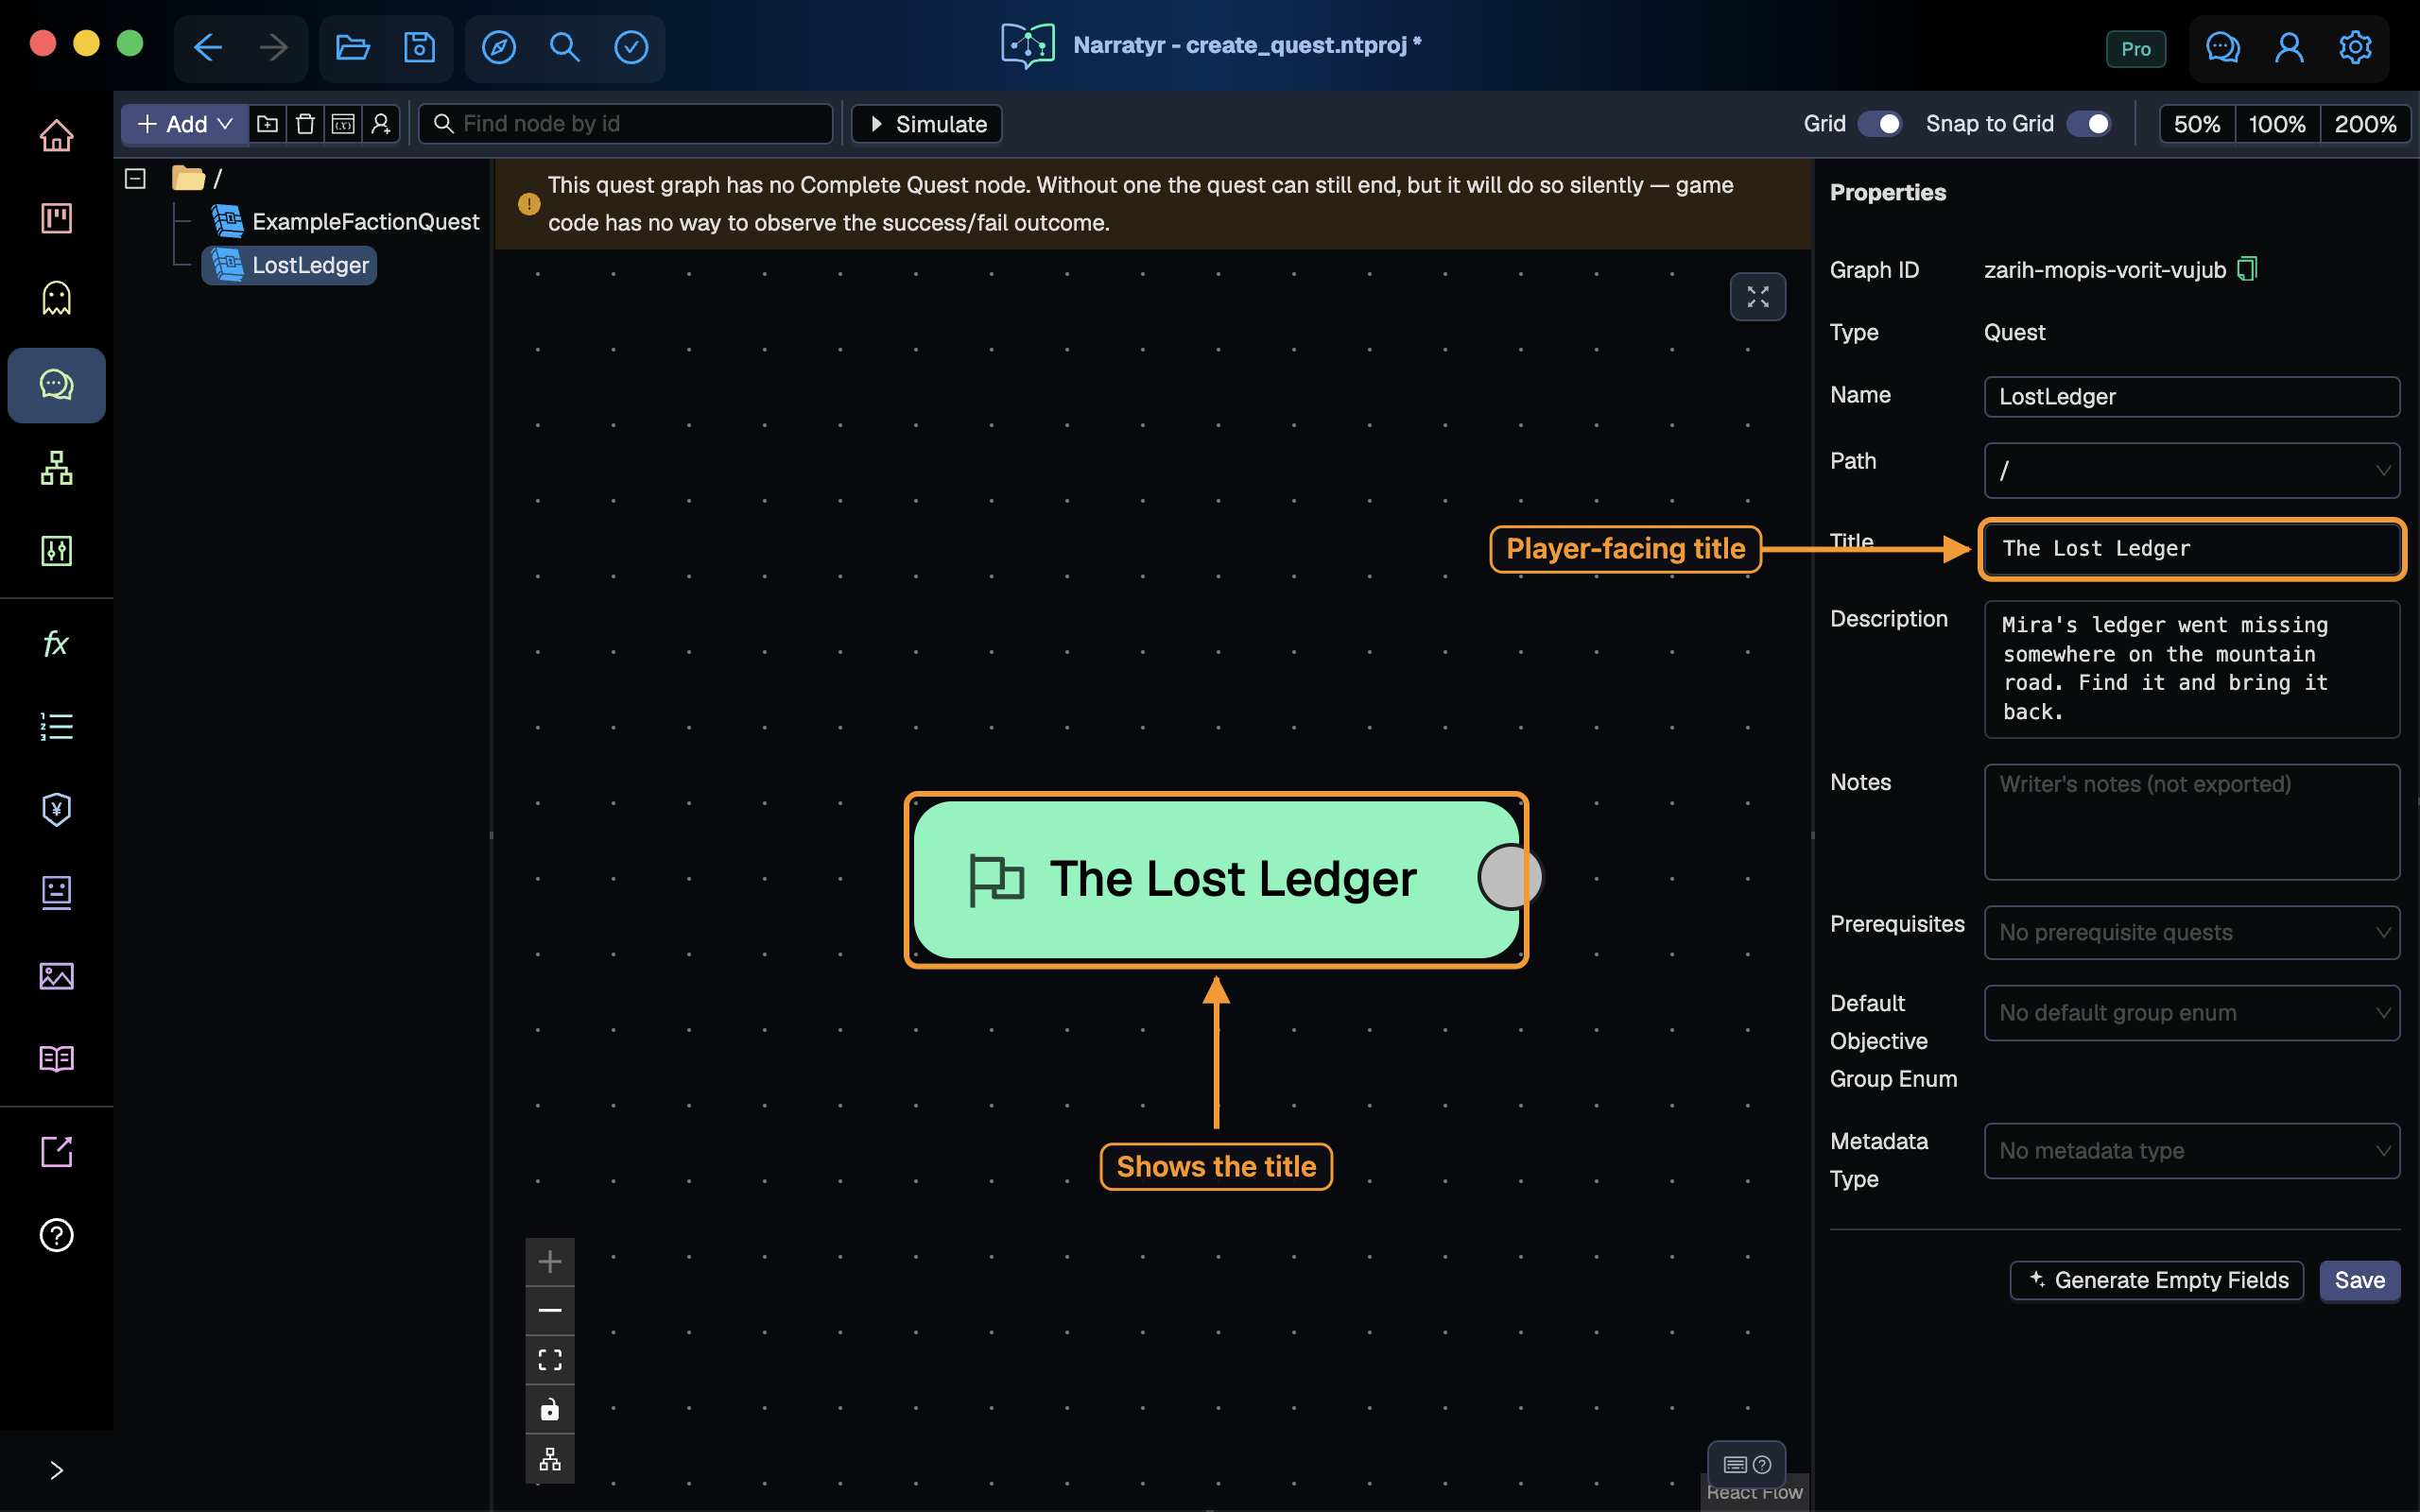
- Name: identifier used by game code.
- Title: player-facing quest name for a journal.
- Description: summary shown with the quest.
The pale green Quest Node marks the graph entry. Narratyr creates it with the quest and prevents its deletion. The node displays the graph title.
A warning at the top of the canvas reports the missing Complete Quest node. The warning disappears after you add an ending. Without that node, the graph can stop without reporting success or failure to your game.
Add an objective
Drag from the handle on the right side of the Quest Node to an empty canvas area. Releasing the connection opens the insert menu. Choose Objective.
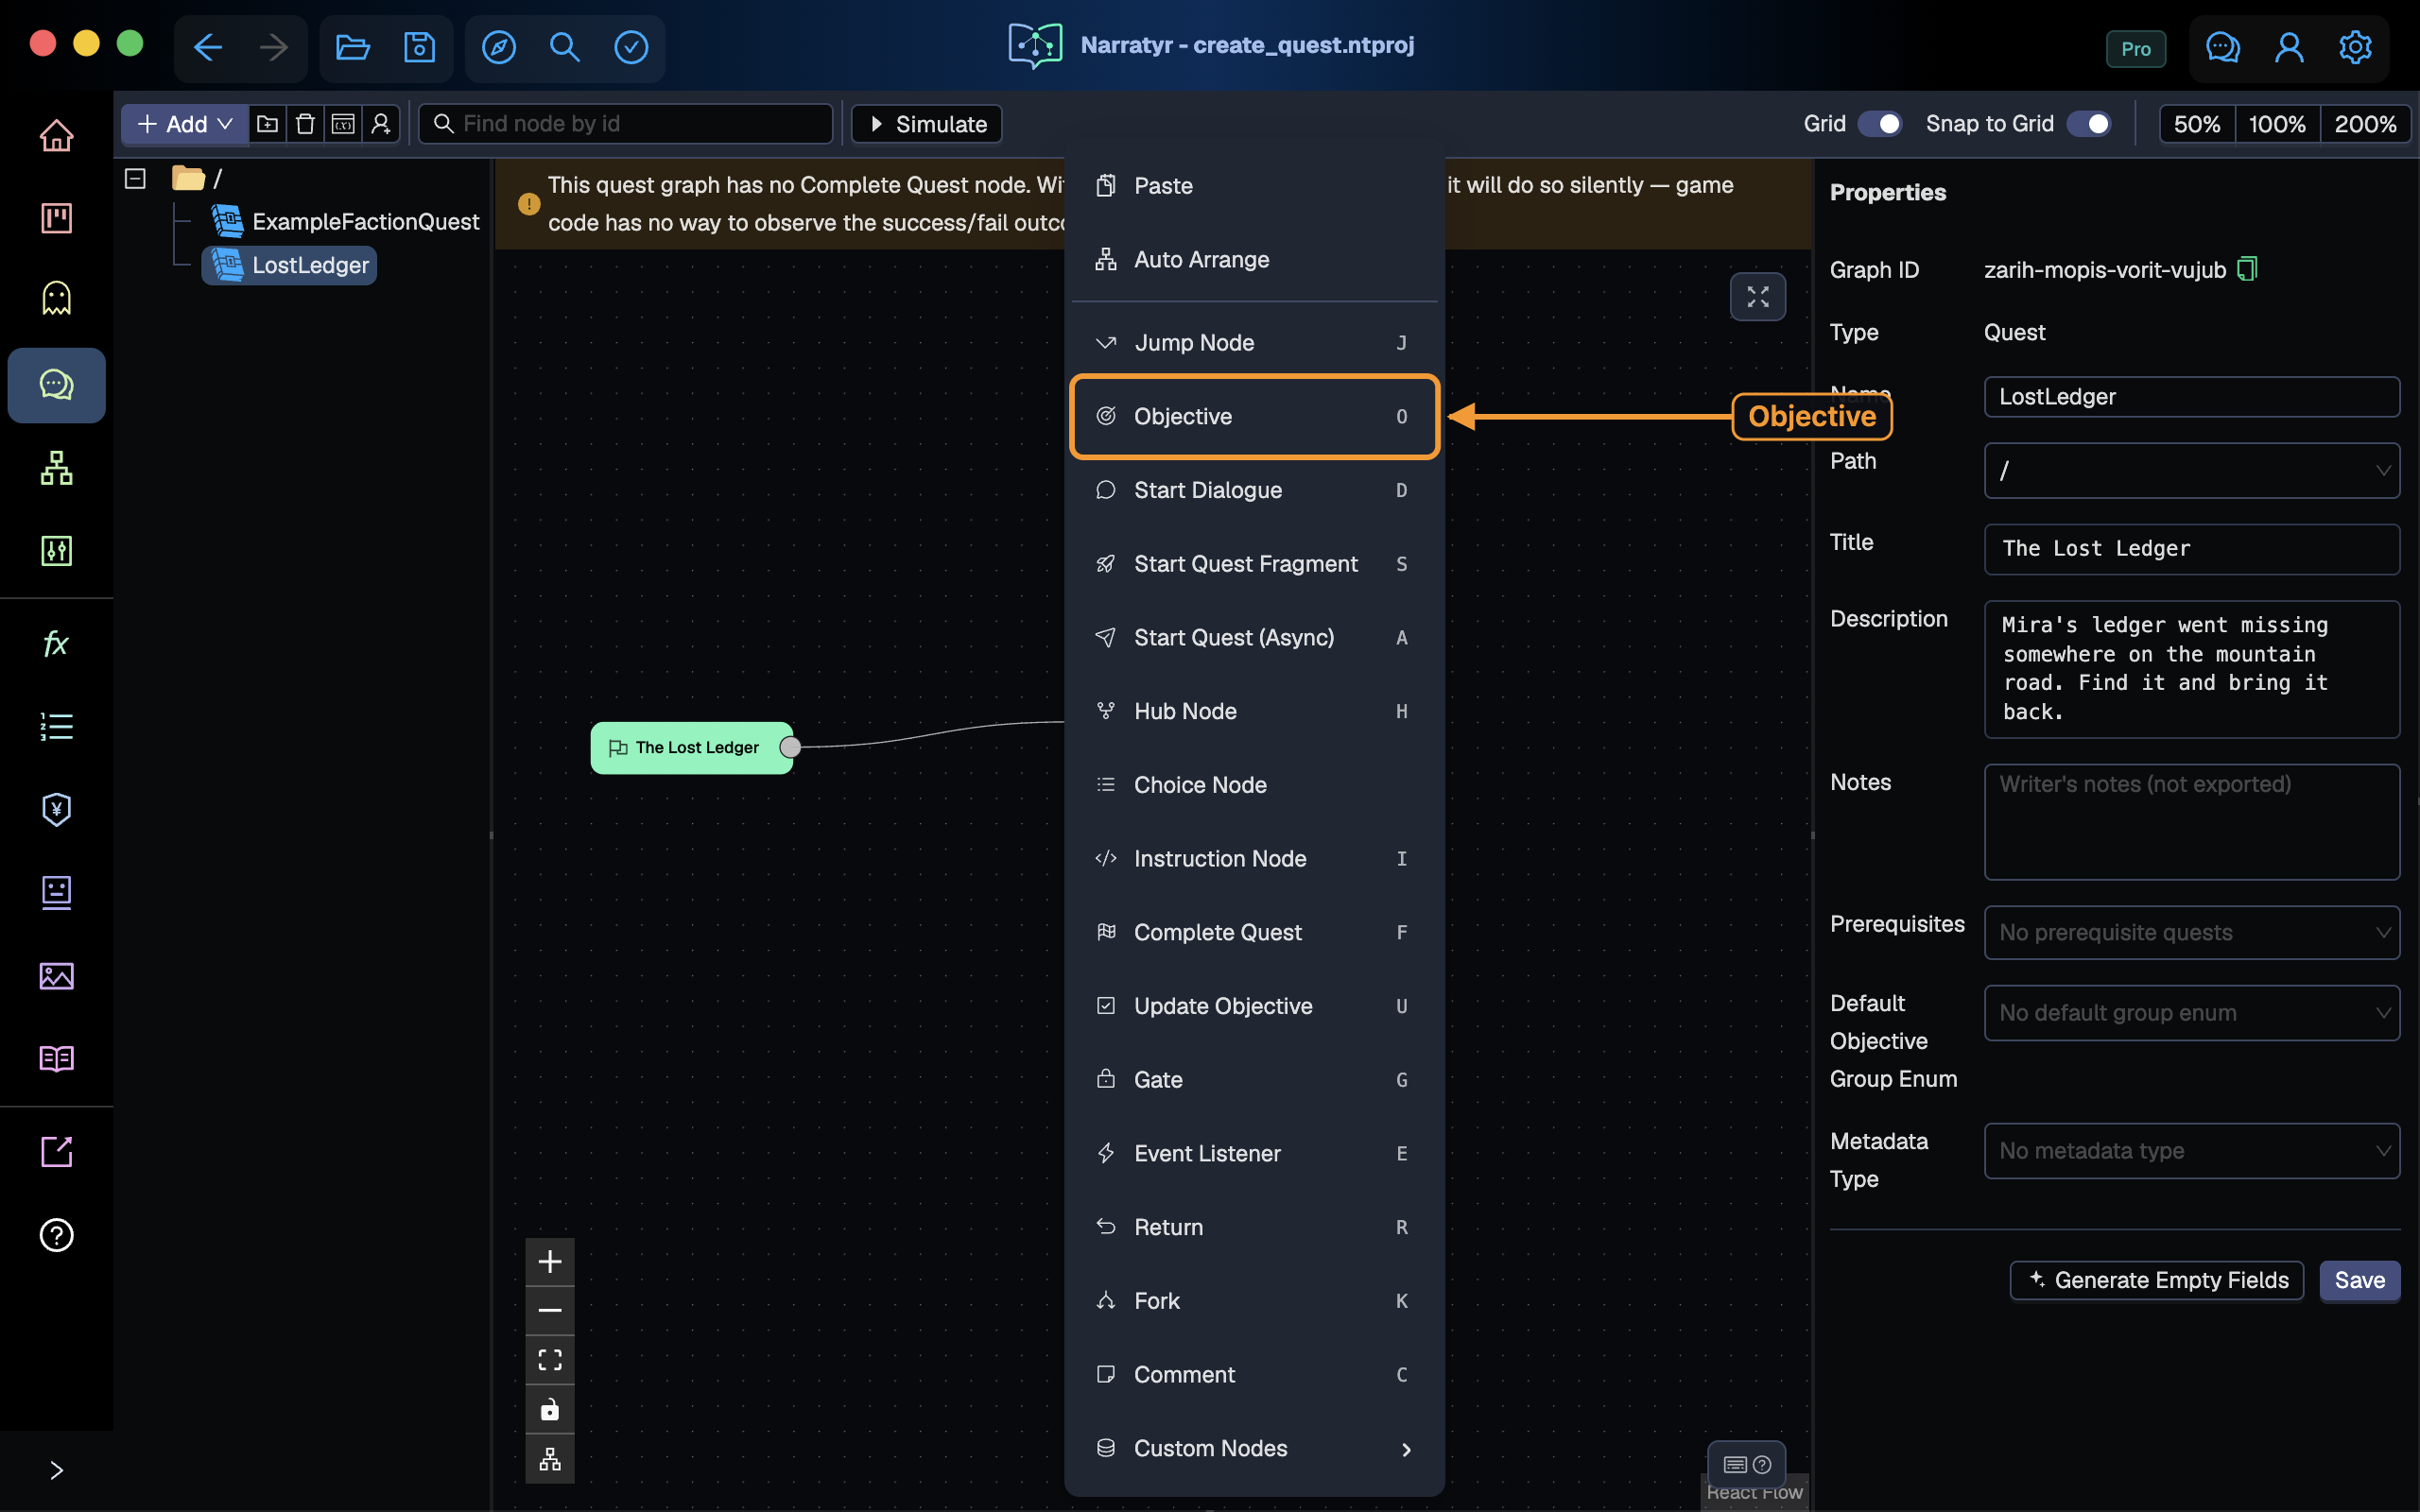
Keyboard shortcuts can also add nodes at the pointer. Use O for Objective, G for Gate, U for Update Objective, and F for Complete Quest. The canvas menu lists the same commands.
Select the new Objective and complete its properties.
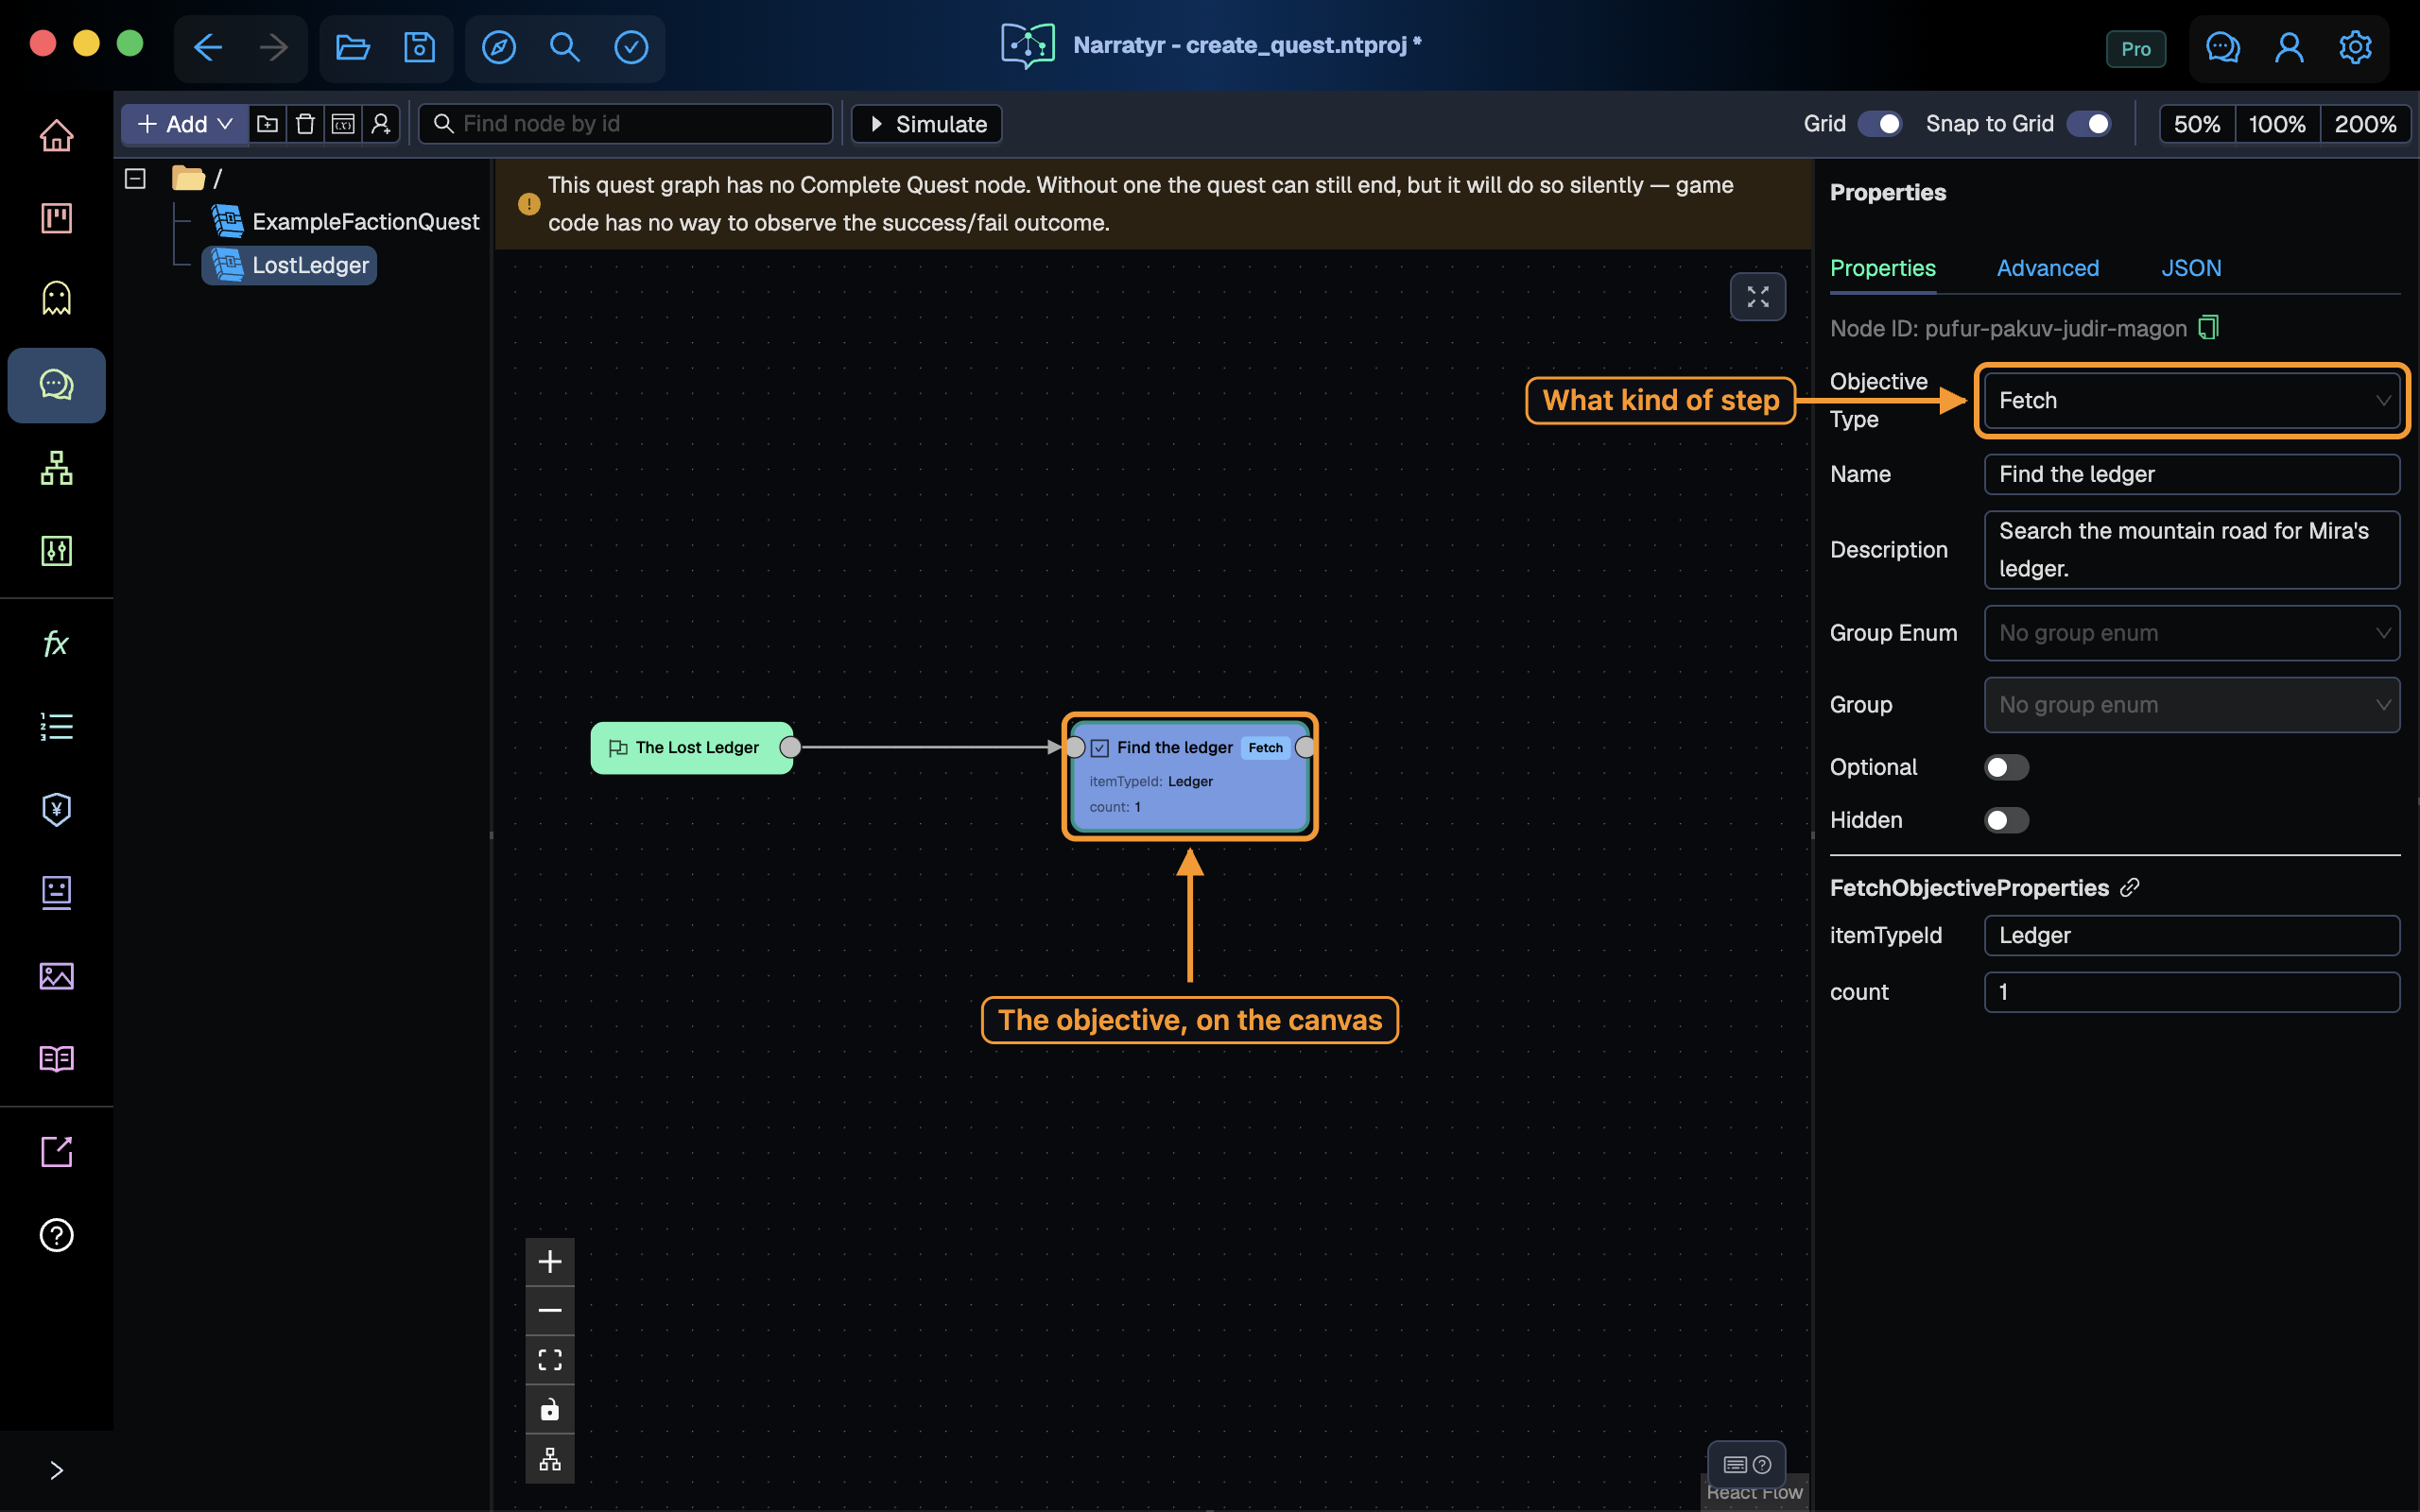
- Objective Type: select Fetch. The selected type controls the additional fields, which are an item and quantity in this project.
- Name: enter the player-facing text shown in the quest log.
- Fields: set
itemTypeIdandcountfor your game. Game code uses these fields to detect completion. Narratyr doesn't inspect them. - Optional and Hidden: leave both settings off for this required, visible objective.
The Objective node introduces the task and continues immediately. A later Update Objective node records completion.
Create a progress variable
Open Variables, select Add Variable, and name it LostLedger_HasLedger.
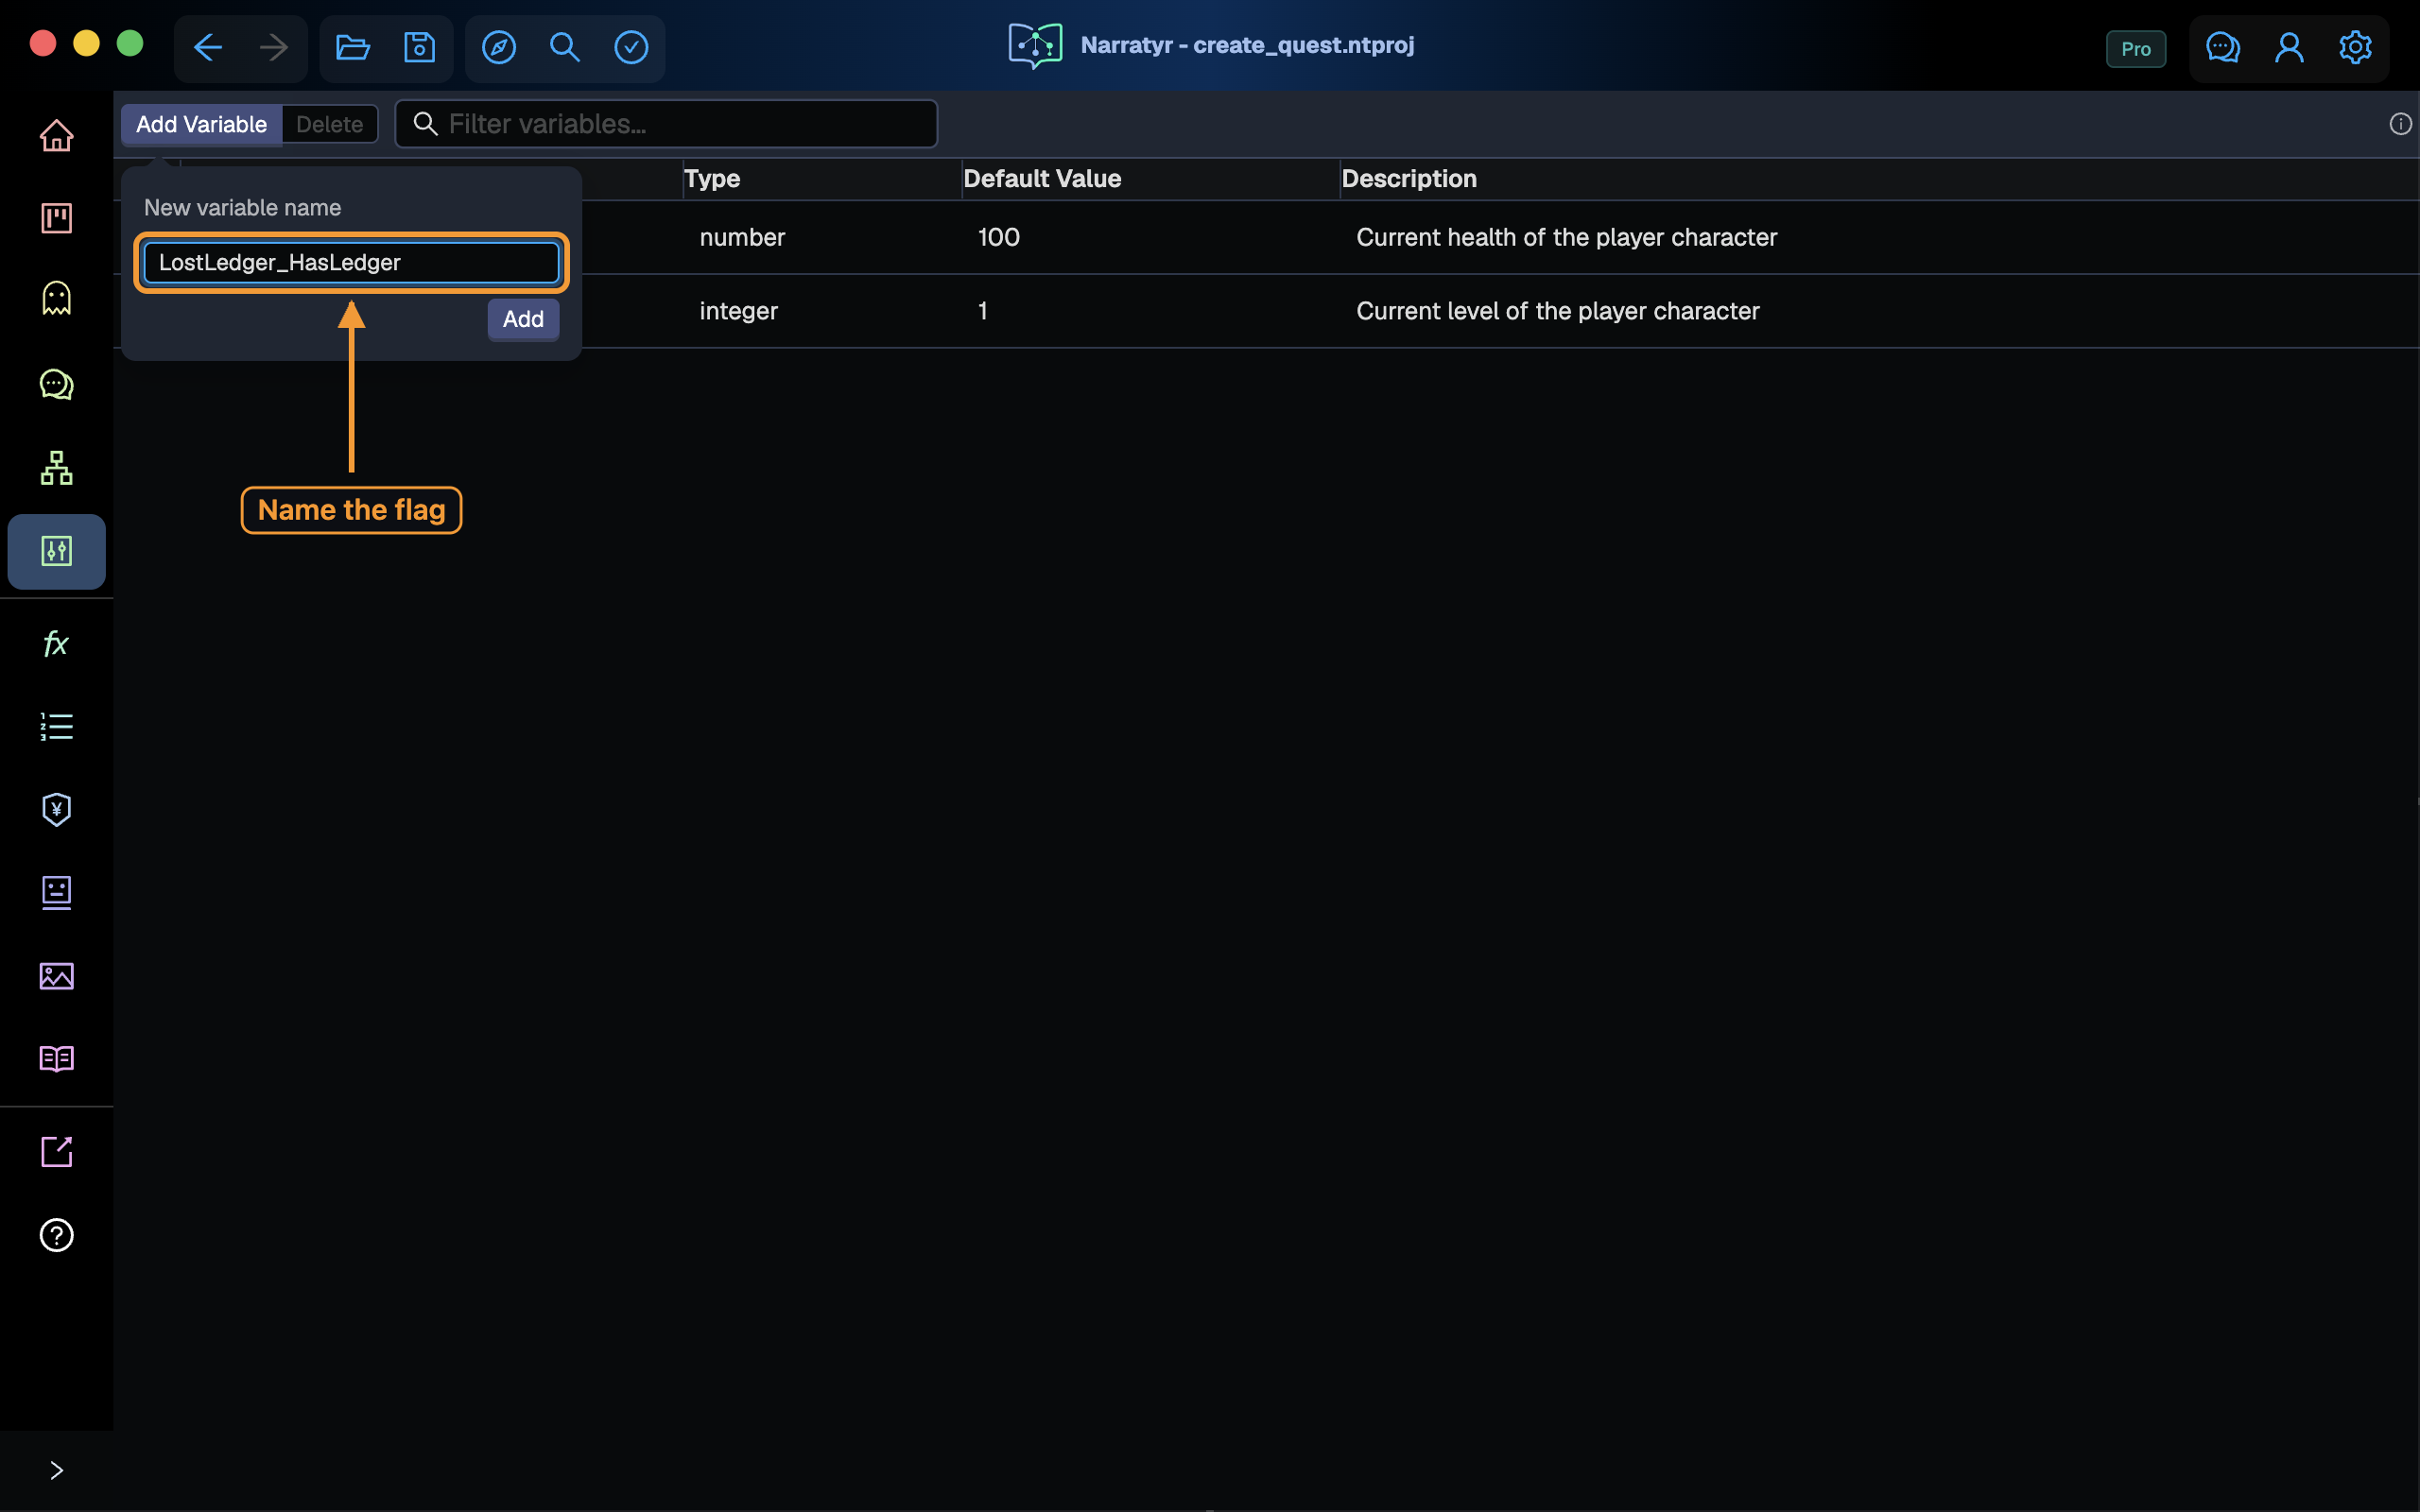
The text before the last underscore acts as a name prefix. It groups related rows in the editor and places variables in the same file for split projects.
A new variable starts as an integer. Select its Type cell twice to open the editor, then
choose boolean. Open Default Value the same way and set it to false.
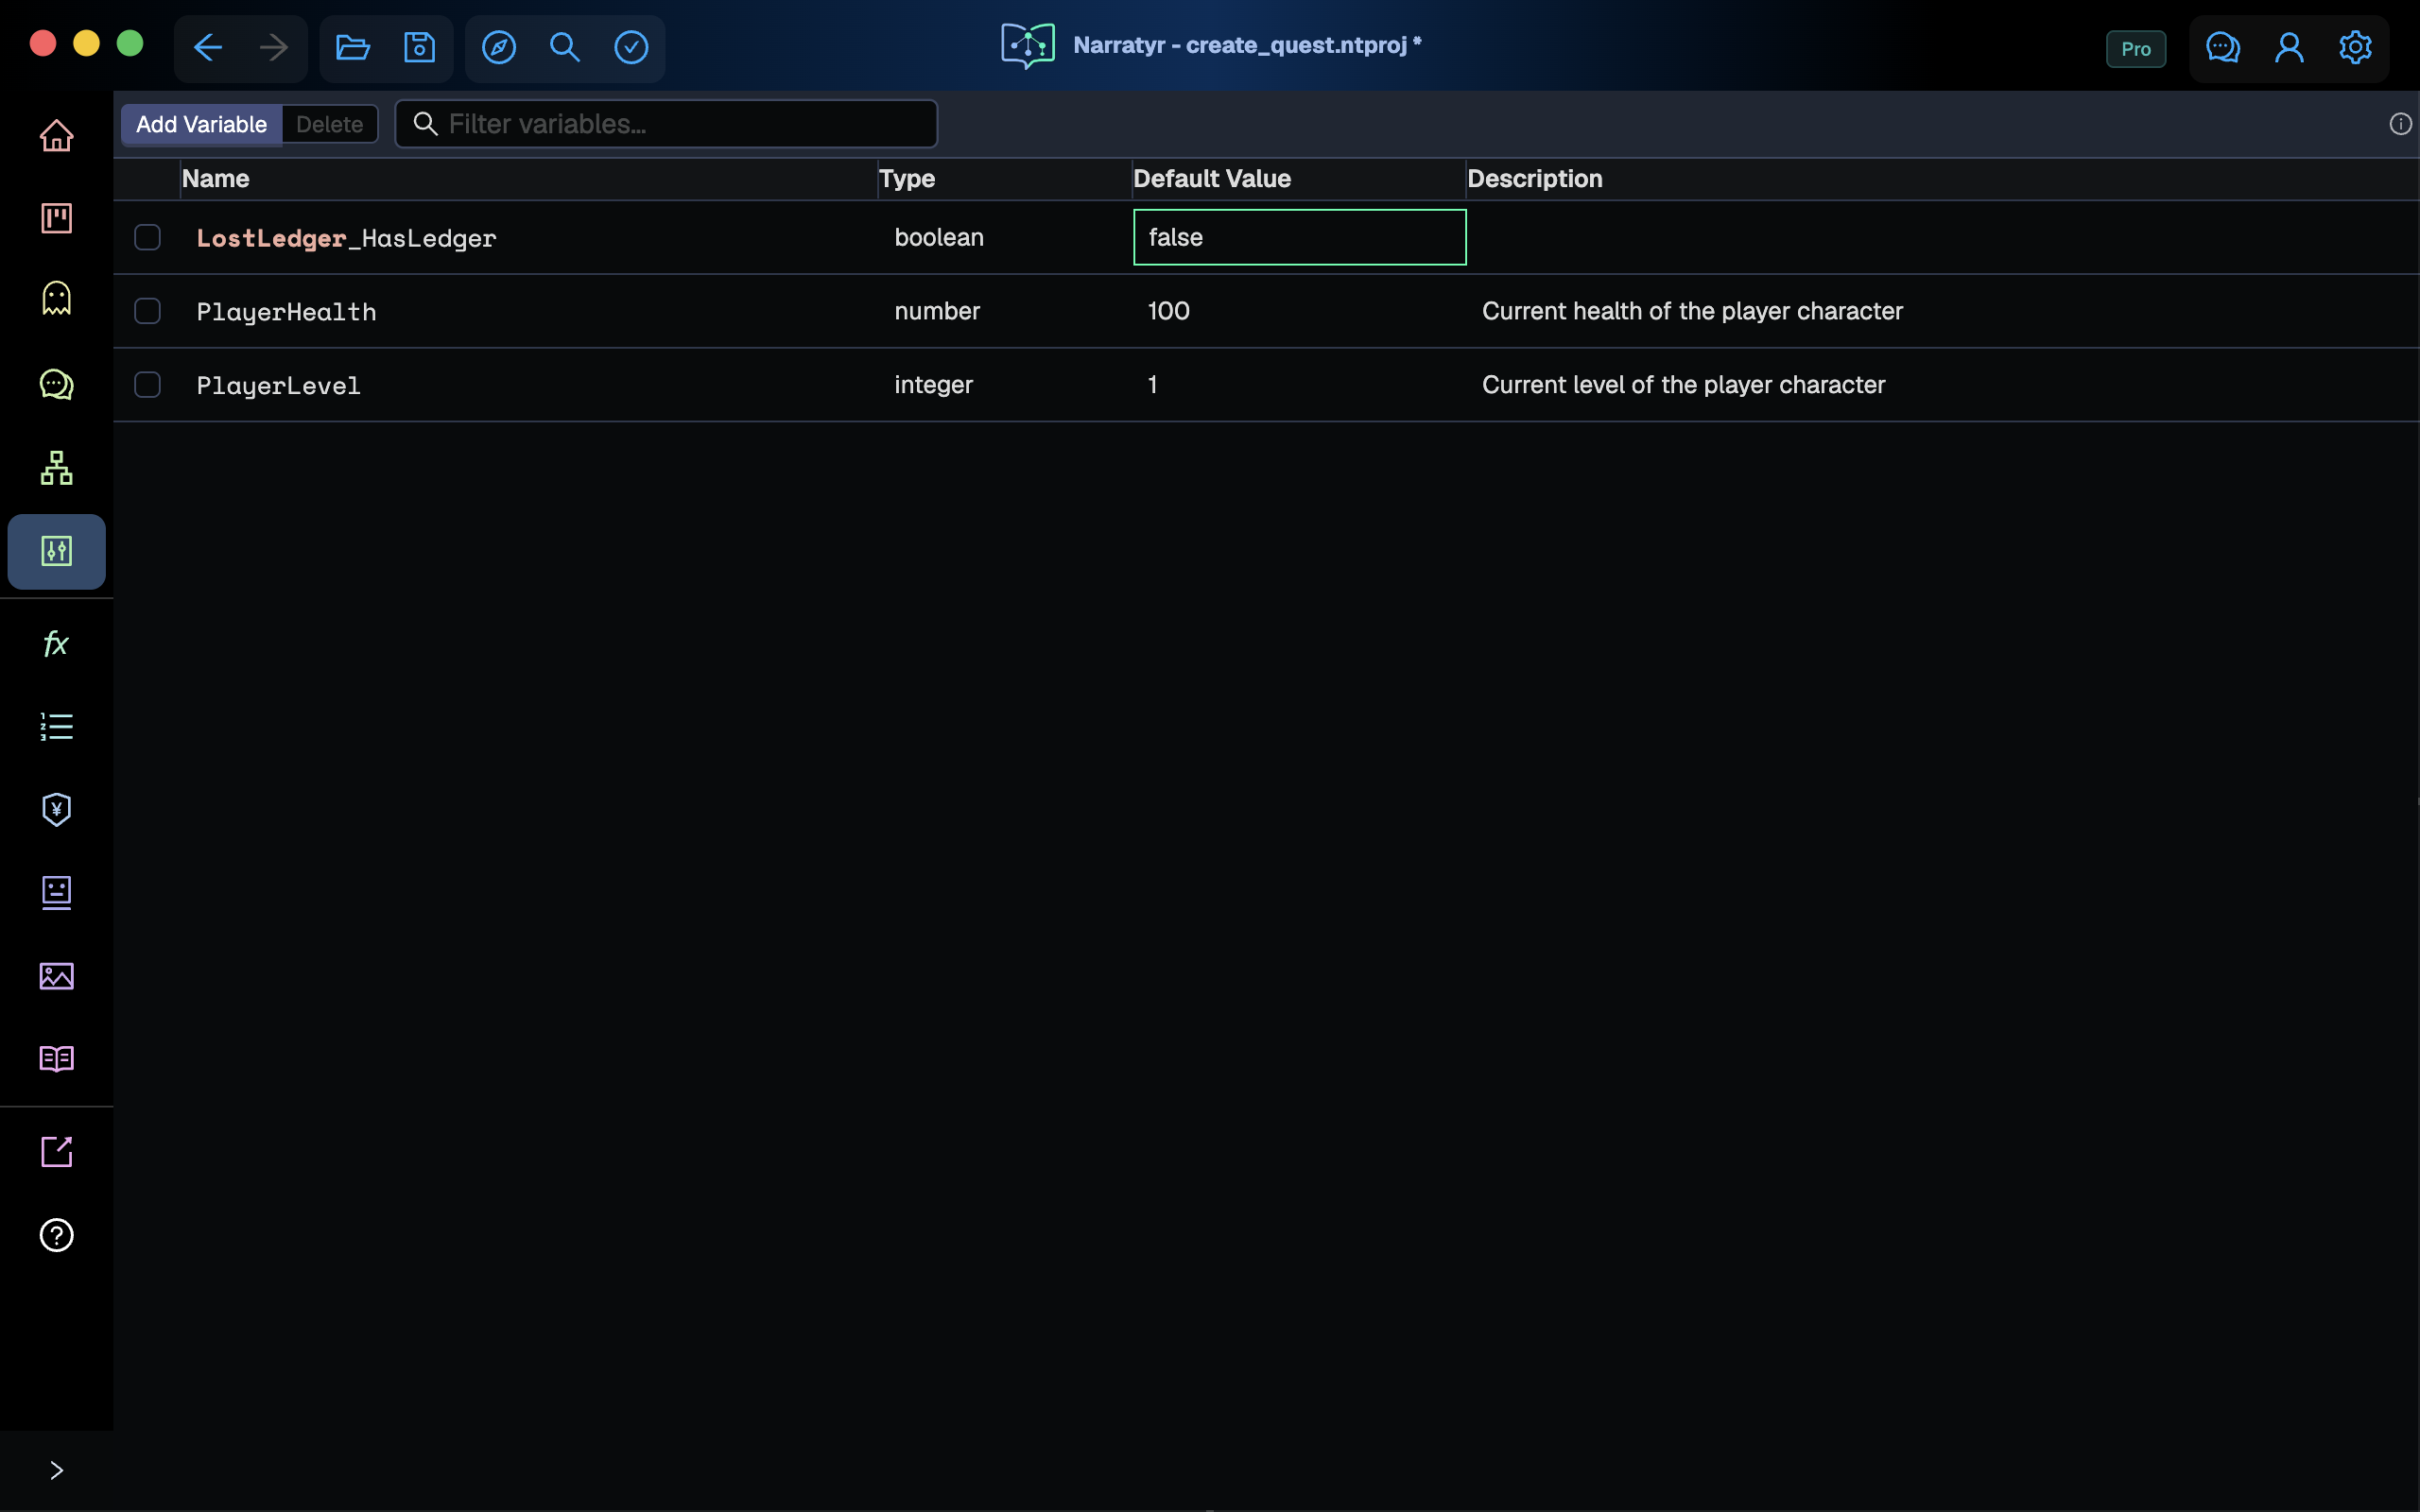
Game code changes this value when the player picks up the ledger. Variables explains how Narratyr and your game share state.
Wait for progress
Return to the quest. Create a Gate from the Objective output. A Gate pauses its branch until its condition becomes true.
Select the Gate to view its condition modes.
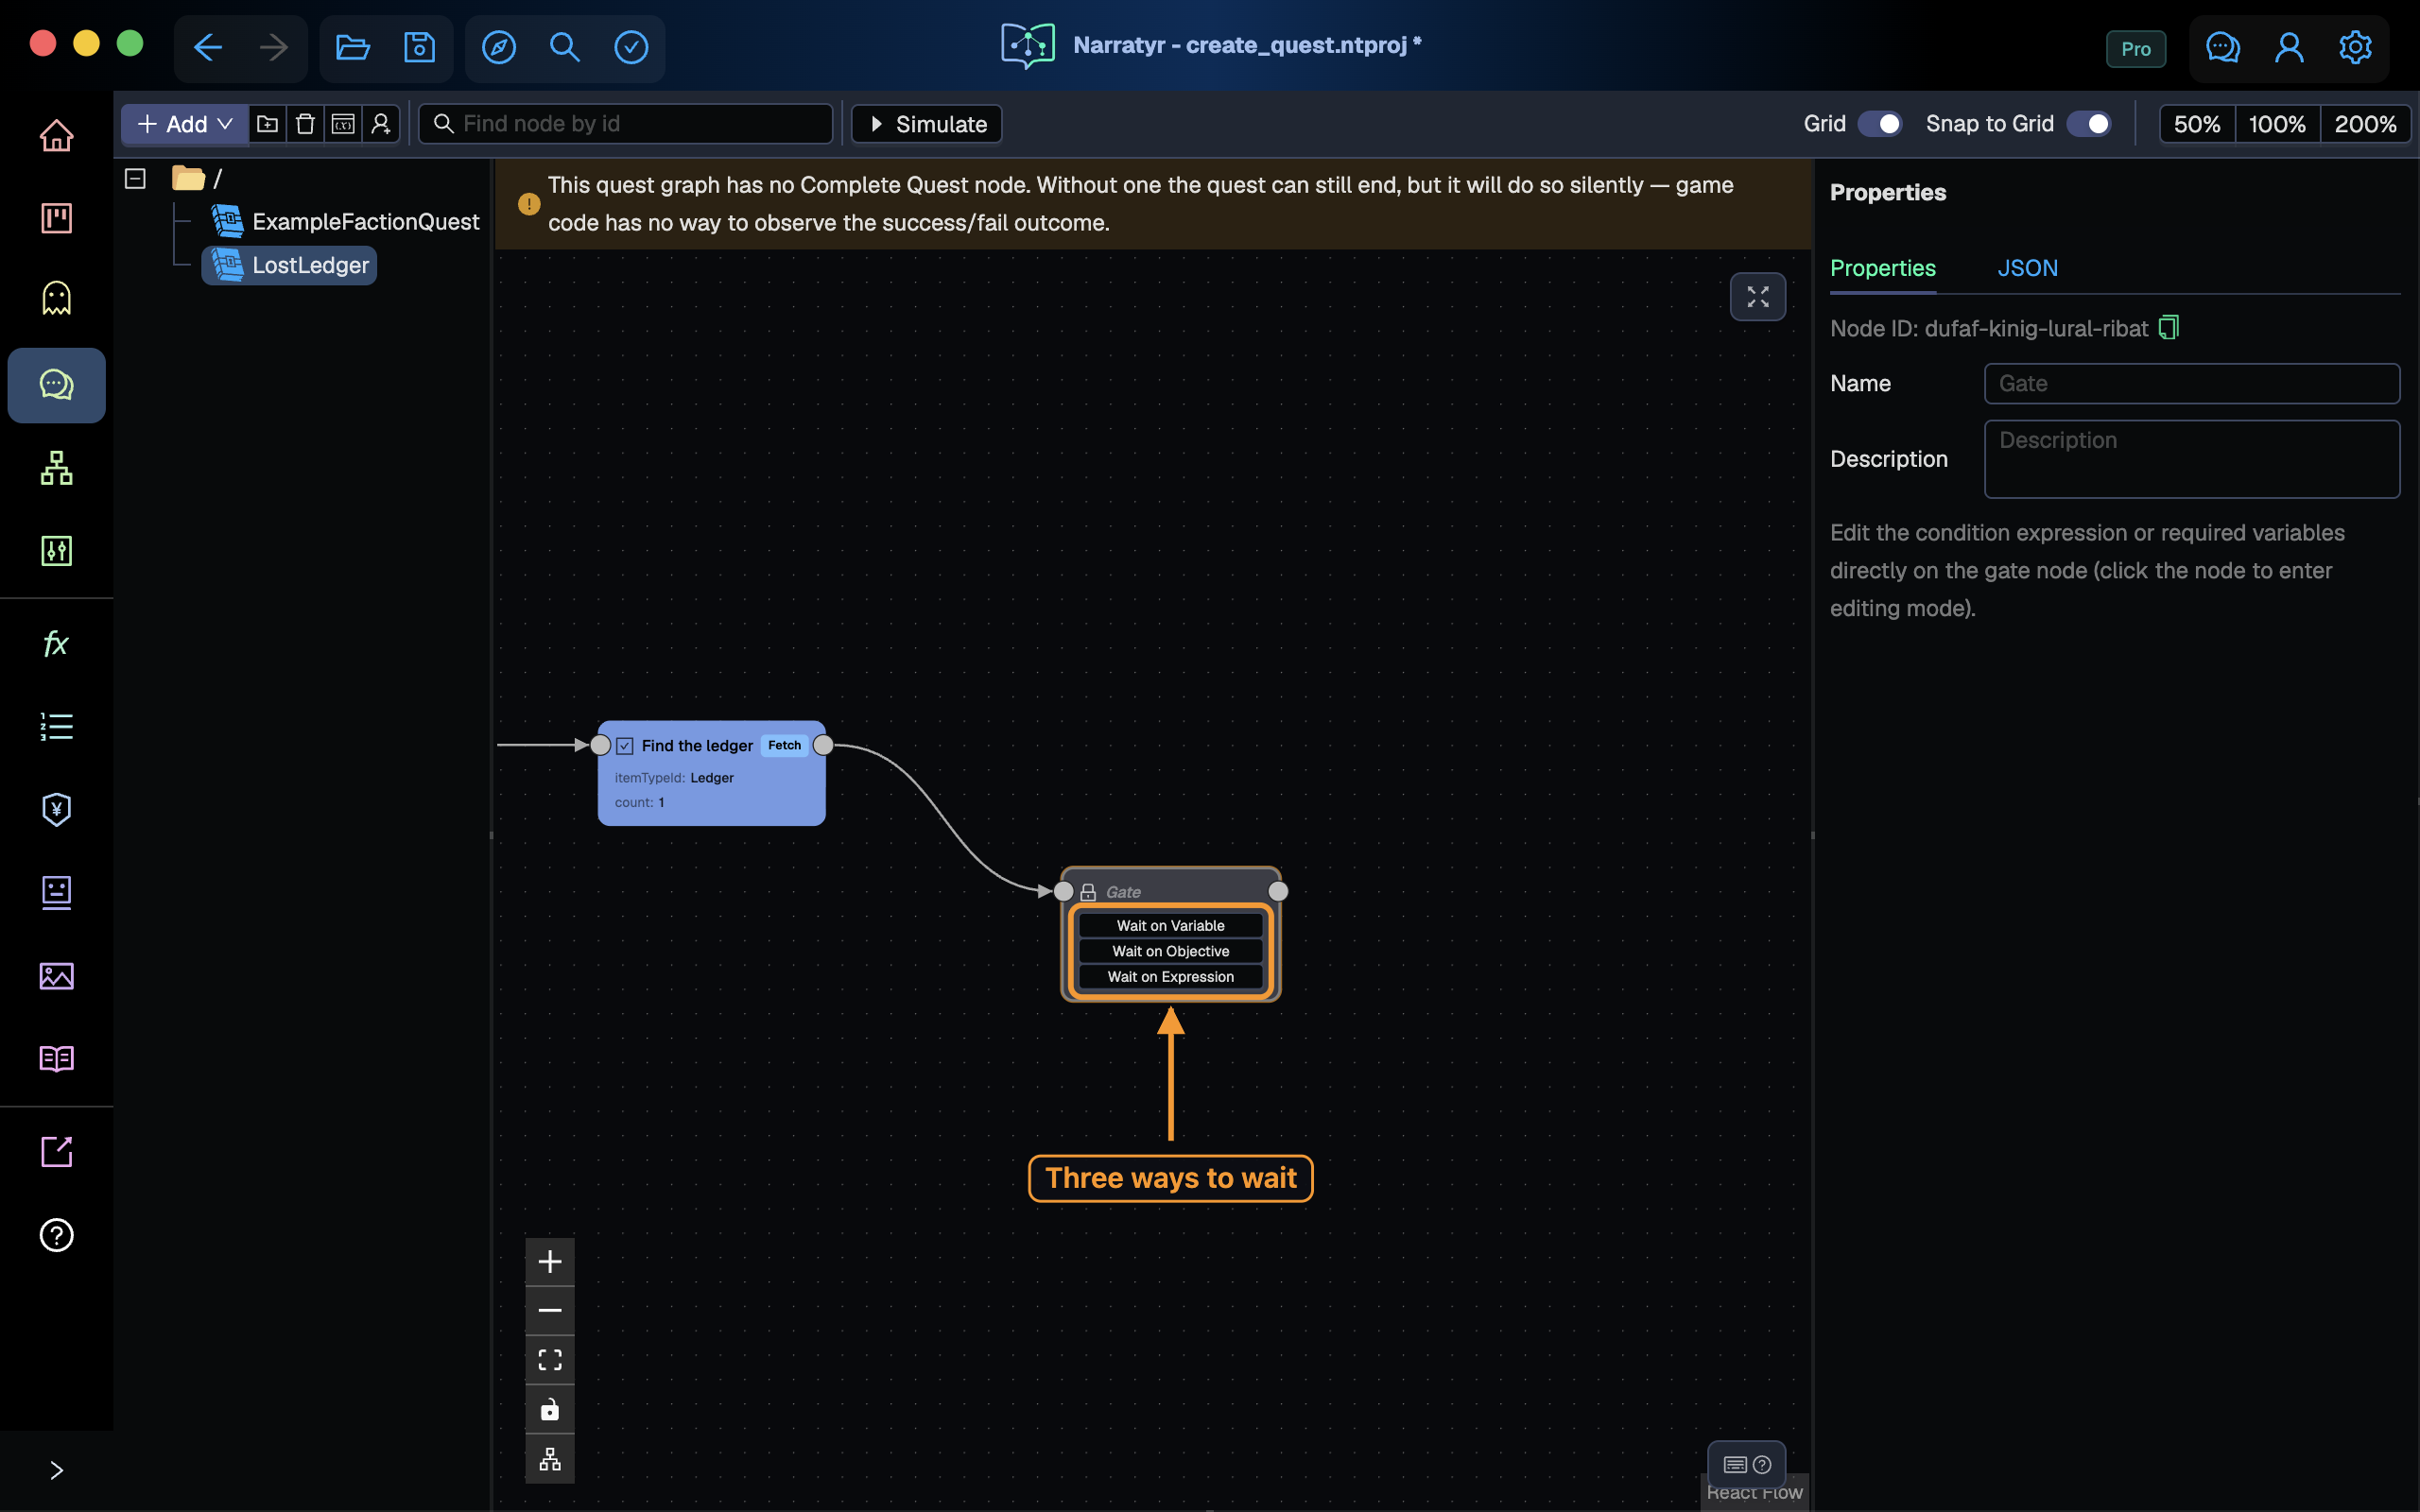
- Wait on Variable: select one or more true or false variables. The Gate resumes after all selected values become true.
- Wait on Objective: select an objective and required state. This mode avoids an extra variable, but game code must update the objective by its ID.
- Wait on Expression: enter any condition supported by the expression language, such as
Gold >= 10 && !HasMap.
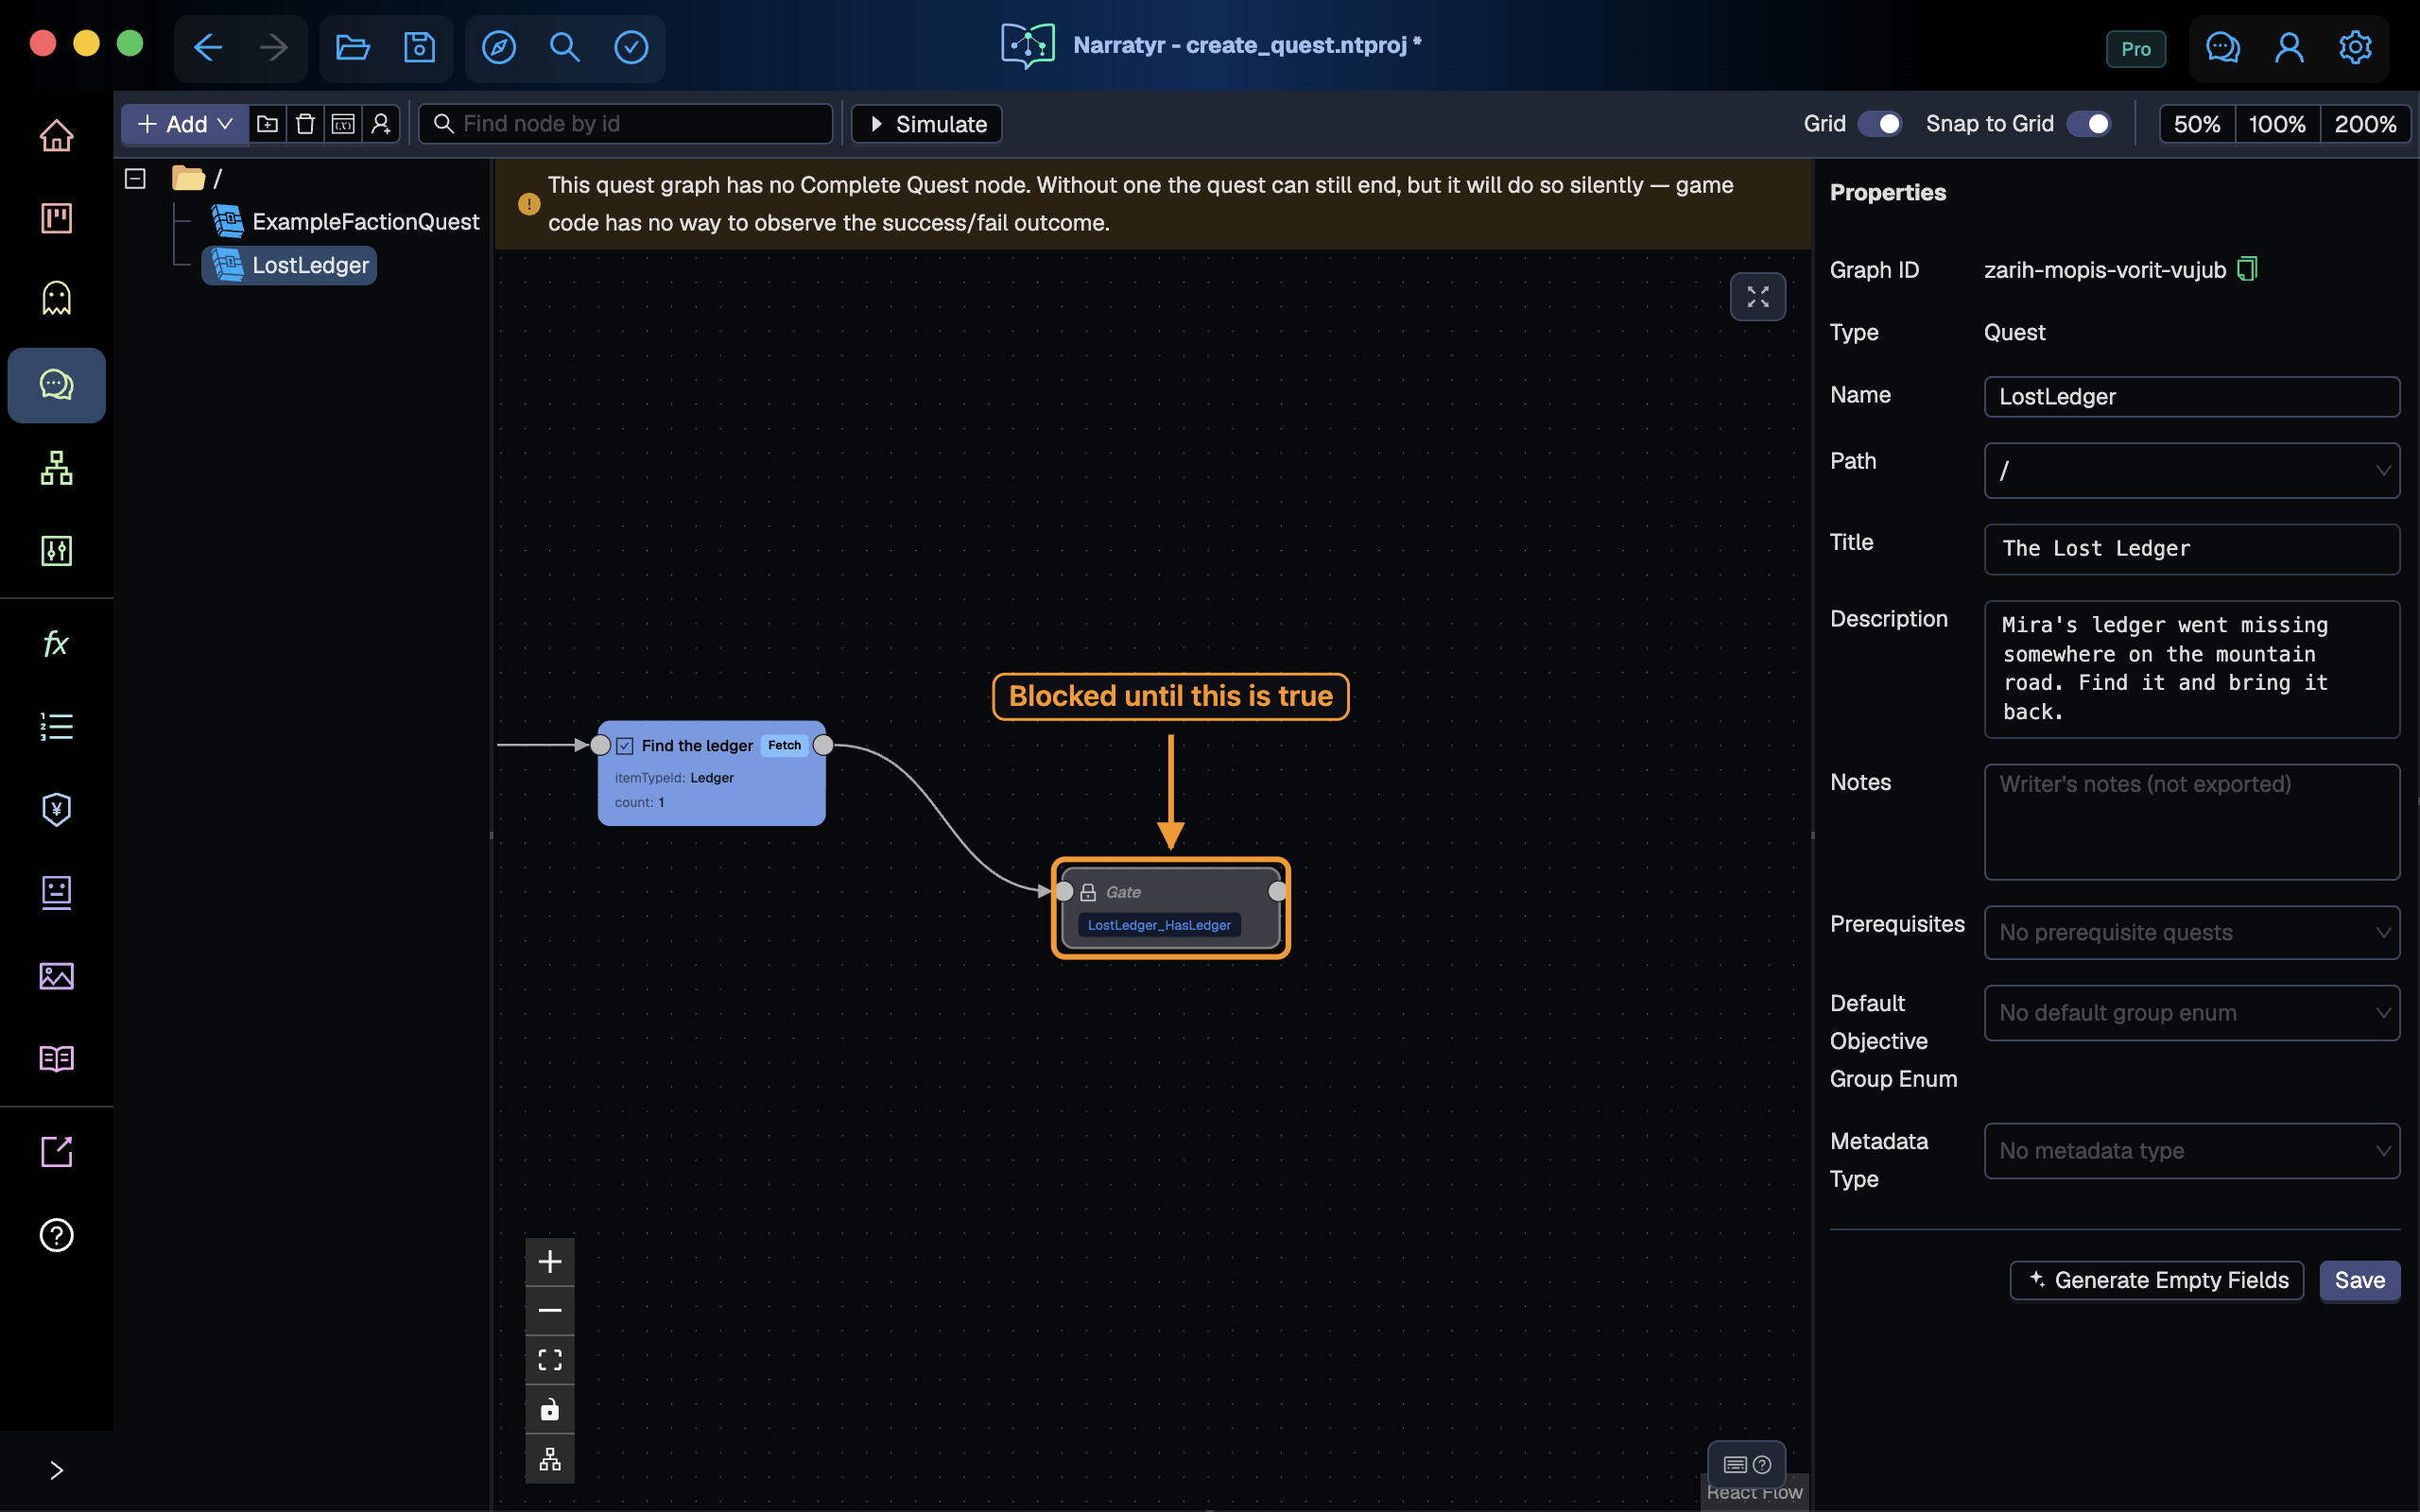
Each mode creates a condition. The runtime checks a paused Gate again after the relevant state changes.
Choose Wait on Variable, then select LostLedger_HasLedger.
Complete the objective
Create an Update Objective node from the Gate output. Select the earlier objective and leave the status set to Completed.
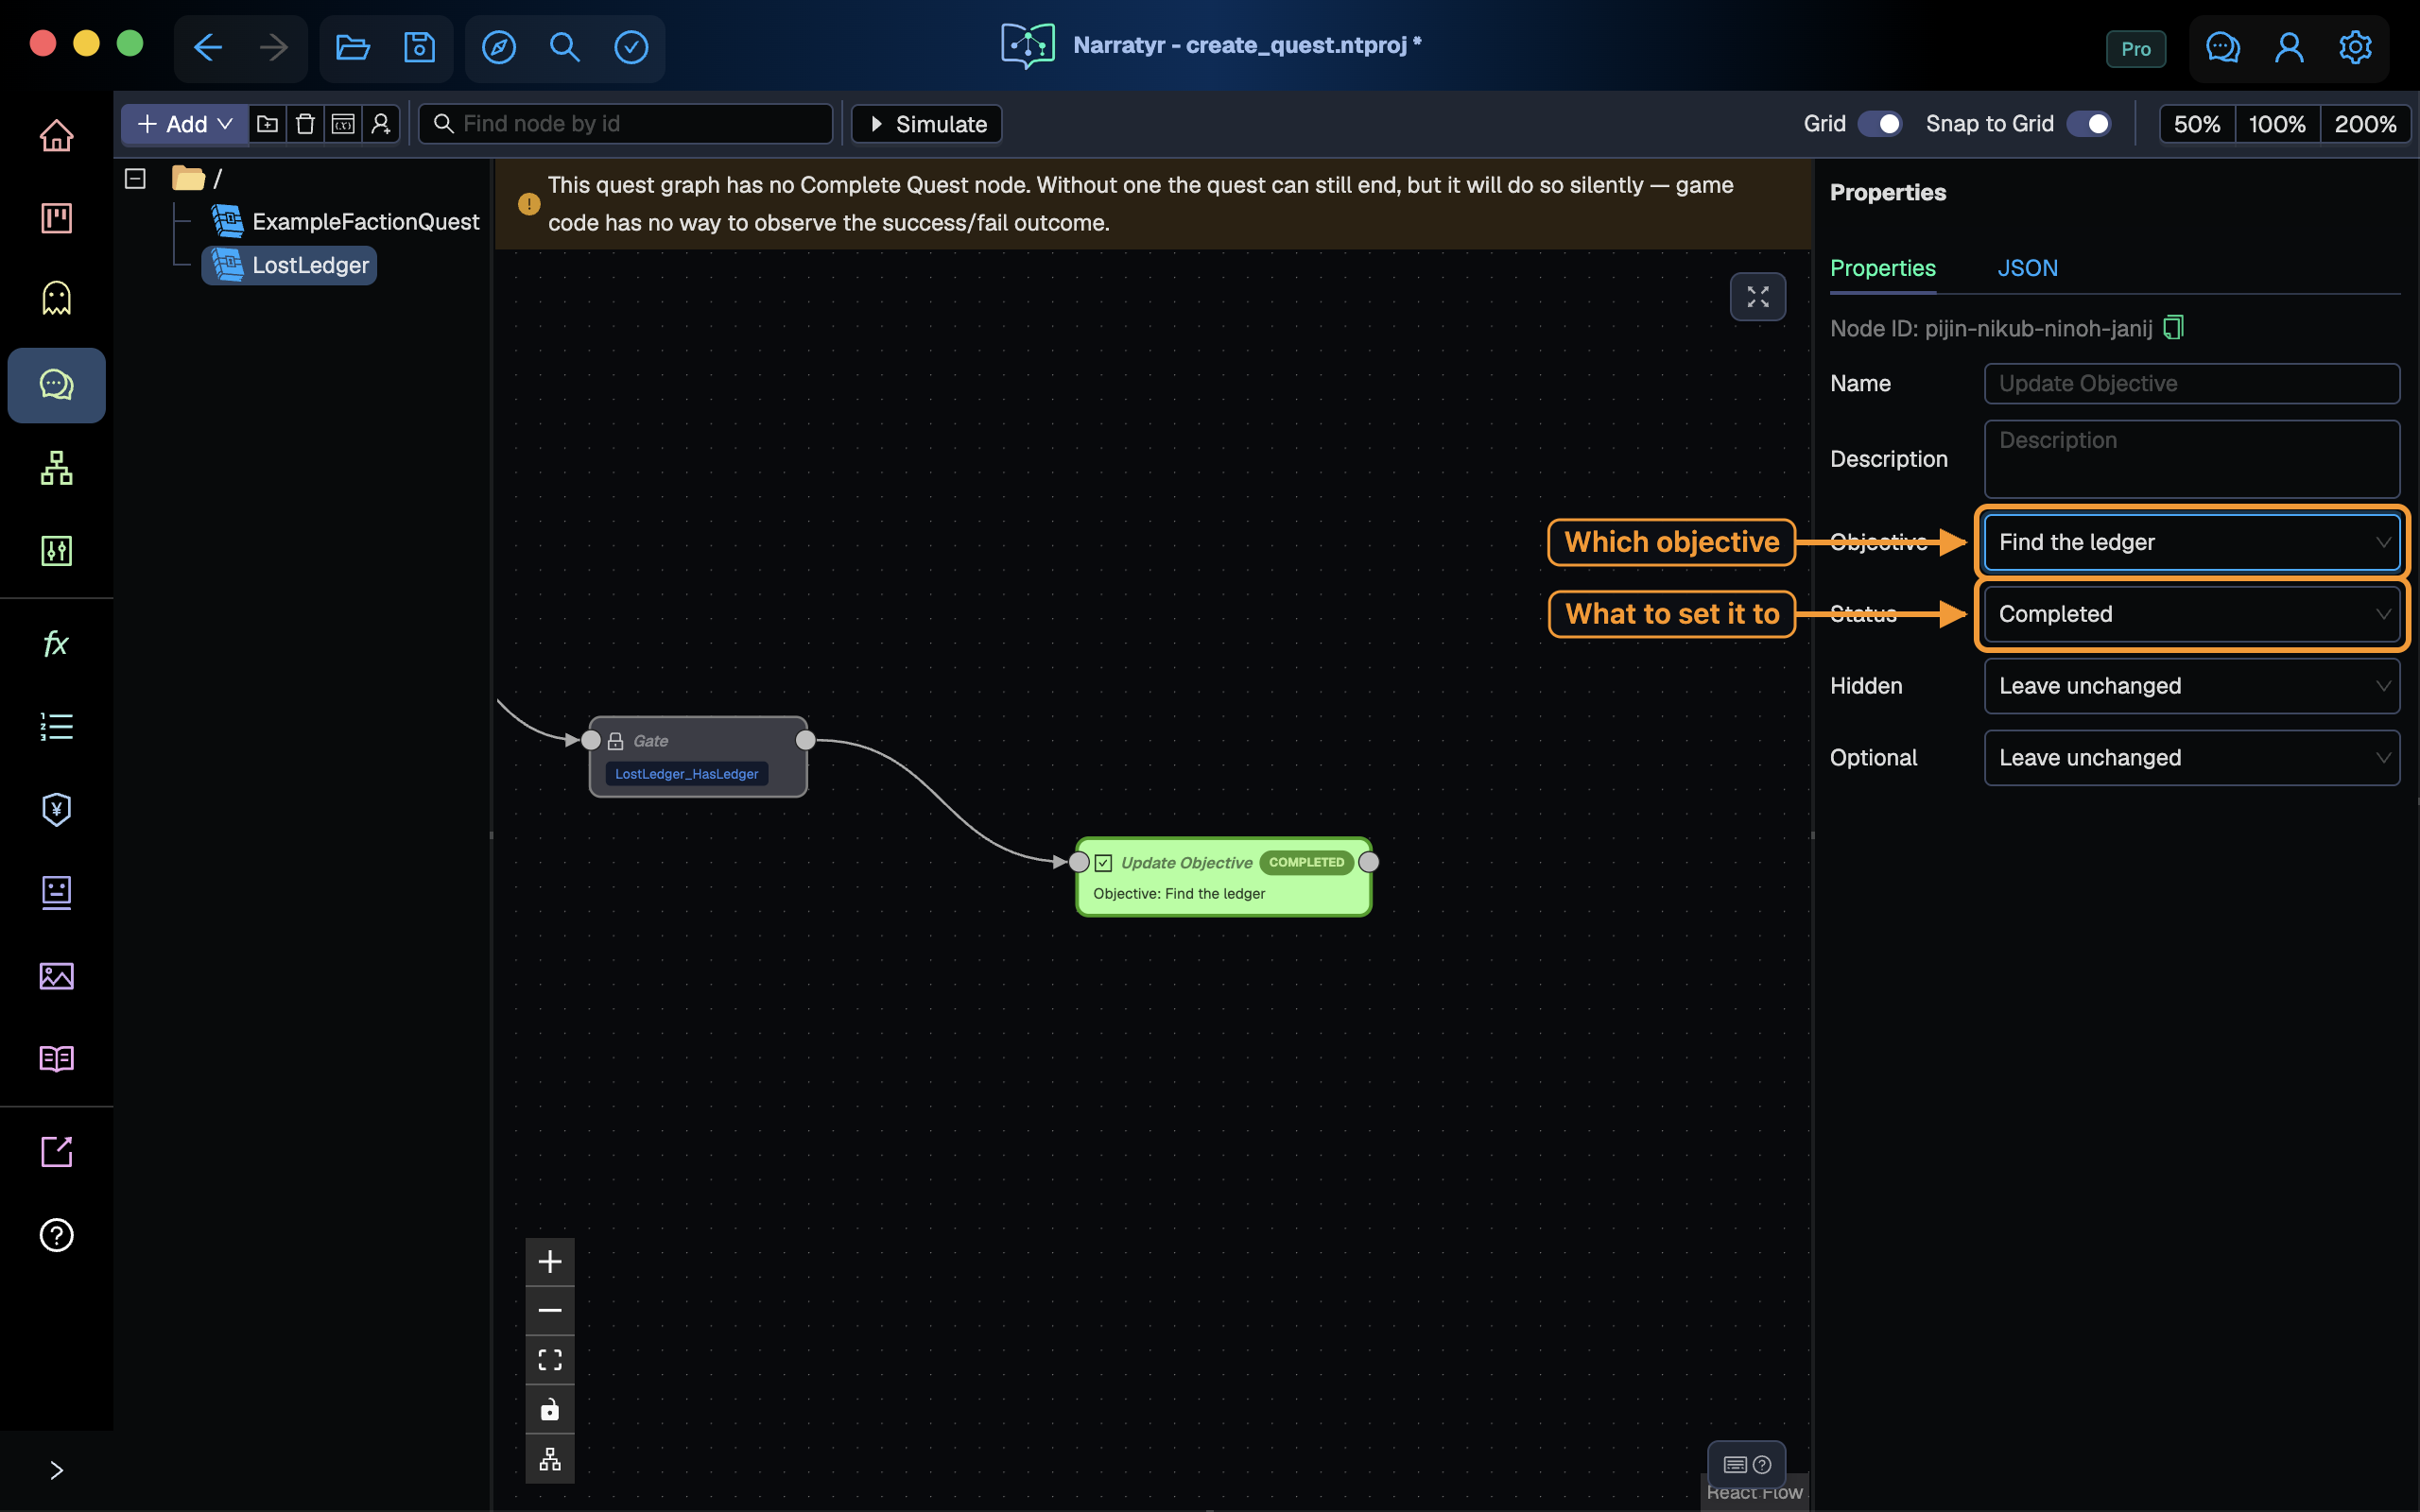
Update Objective changes only the fields you select. Leave unchanged preserves the other values. The node can also reveal or reopen an objective. Other settings change its optional flag or mark it as failed.
Complete the quest
Create a Complete Quest node from the Update Objective output. Leave its status set to Success.
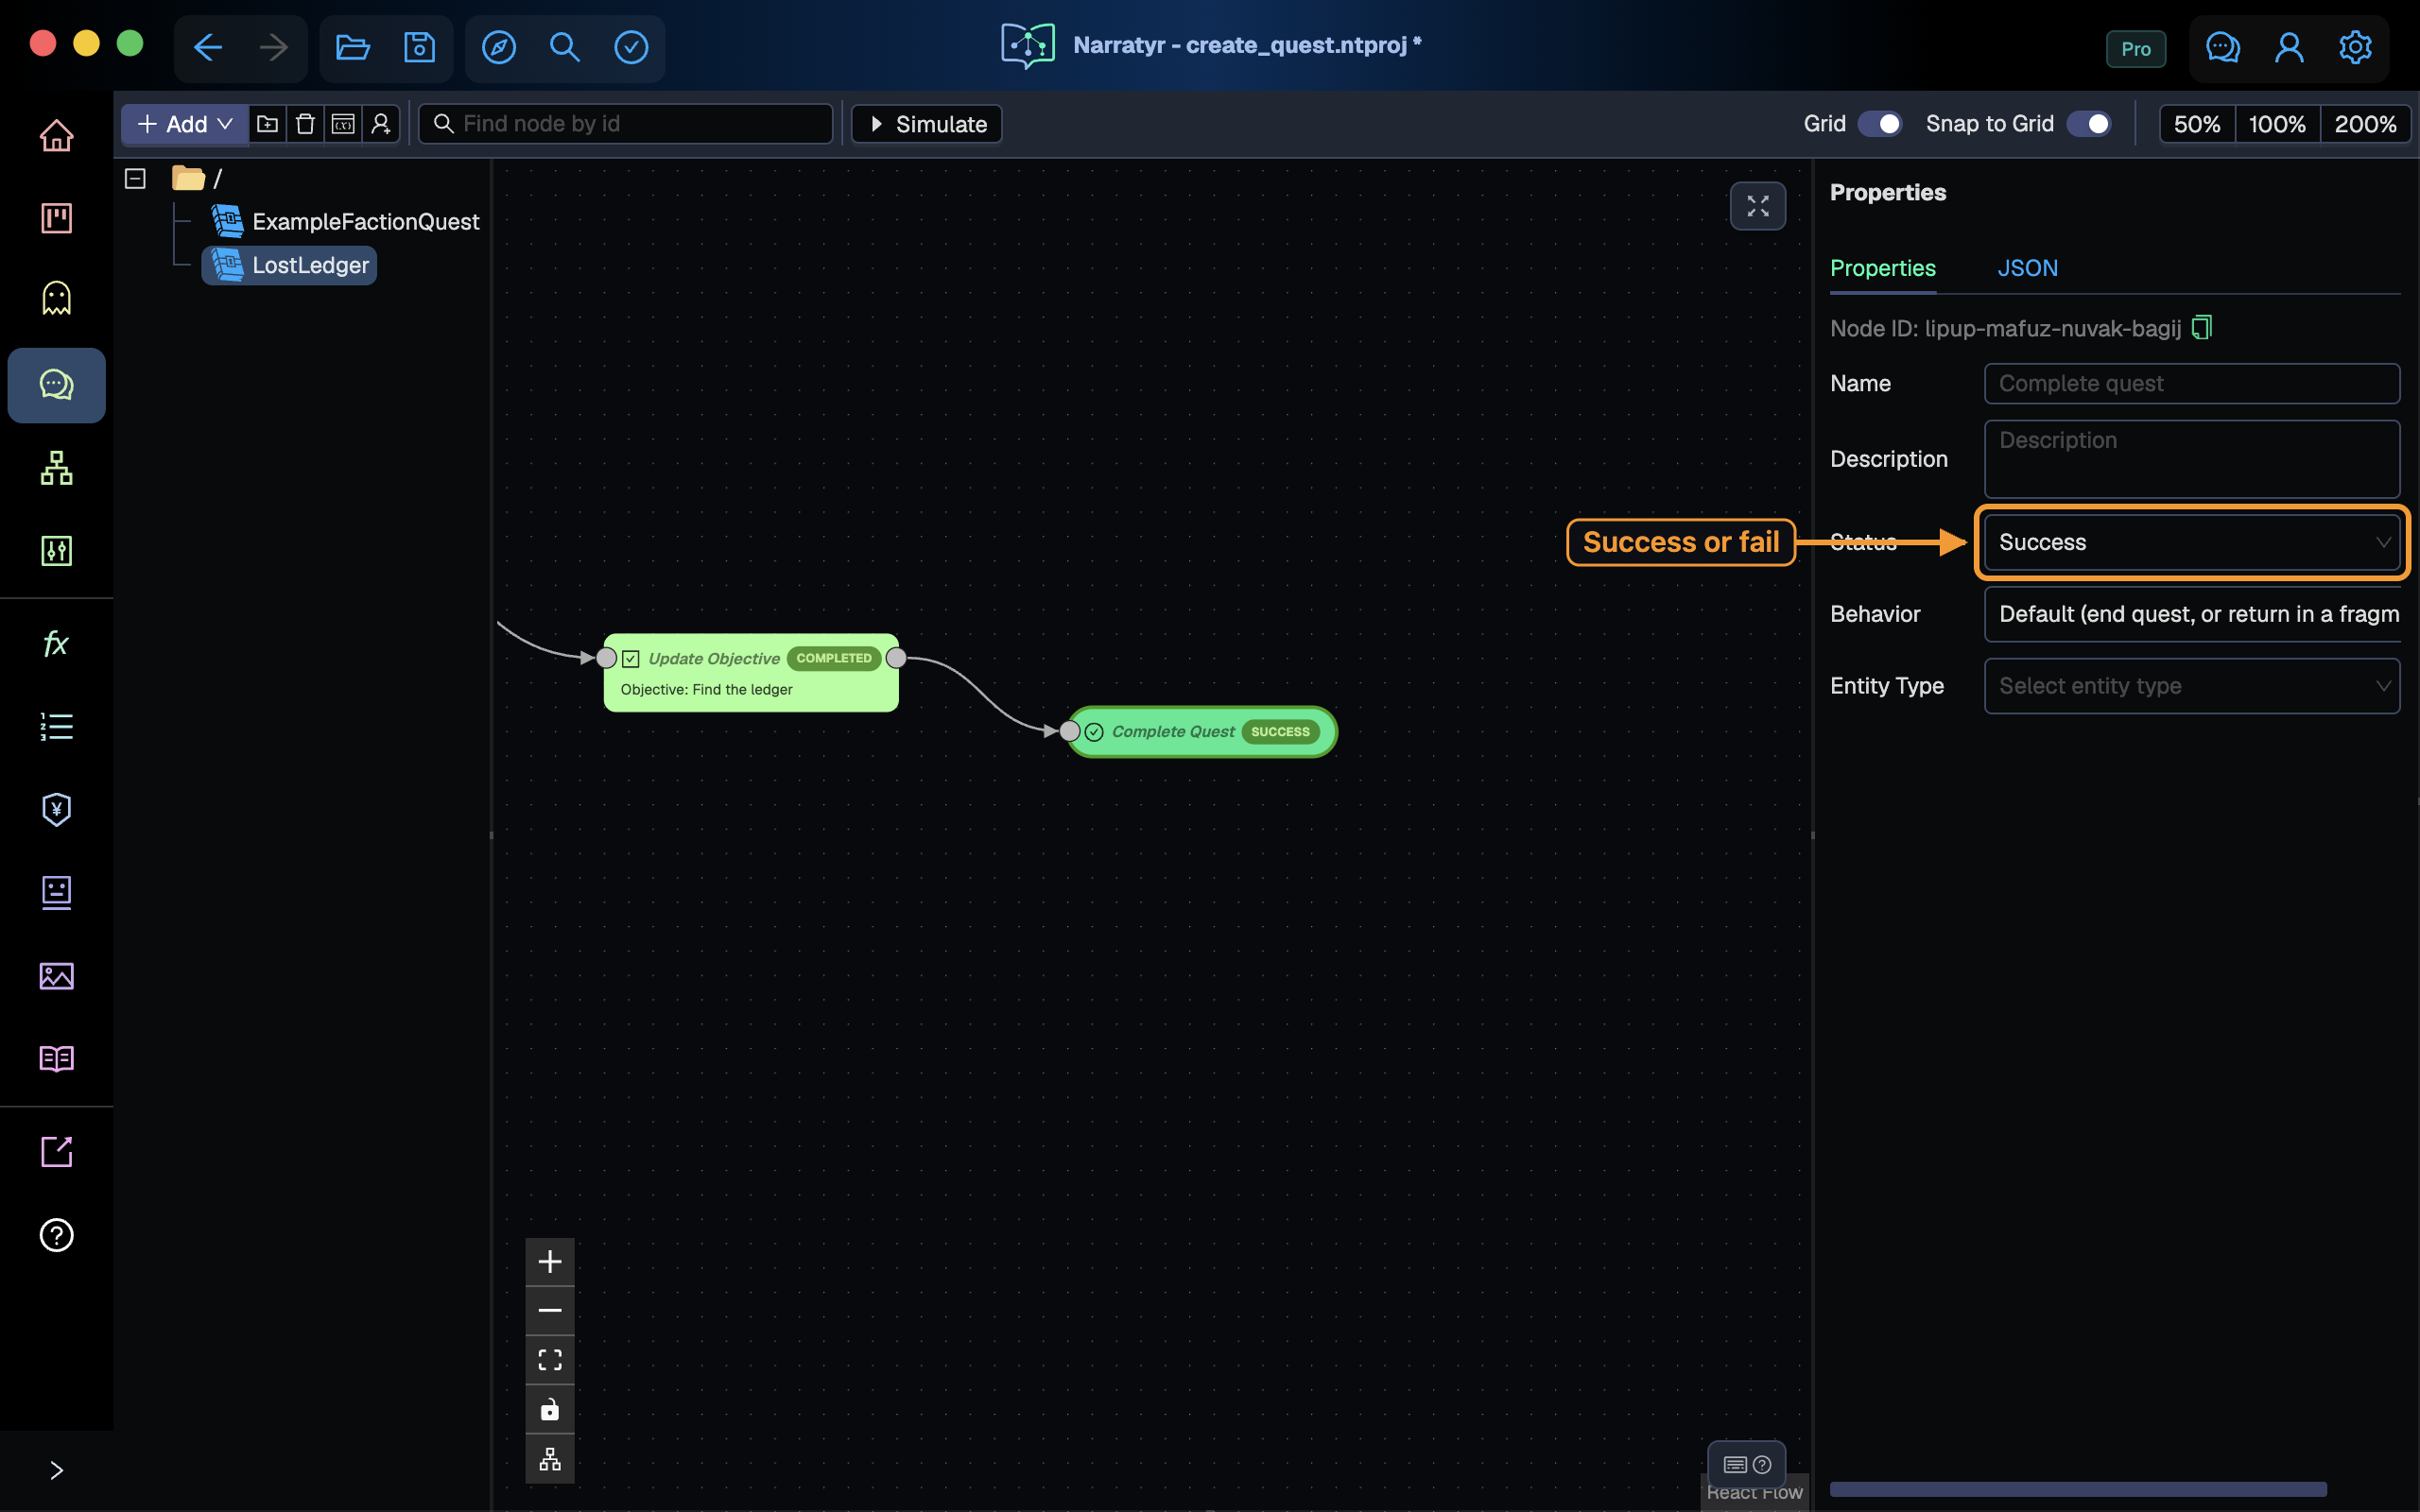
Complete Quest ends the flow and reports the result to your game. A quest can have several ending nodes for different outcomes. Adding this node also removes the canvas warning.
Arrange and save the quest
Select the expand button in the upper-right corner of the canvas to hide the side panels.
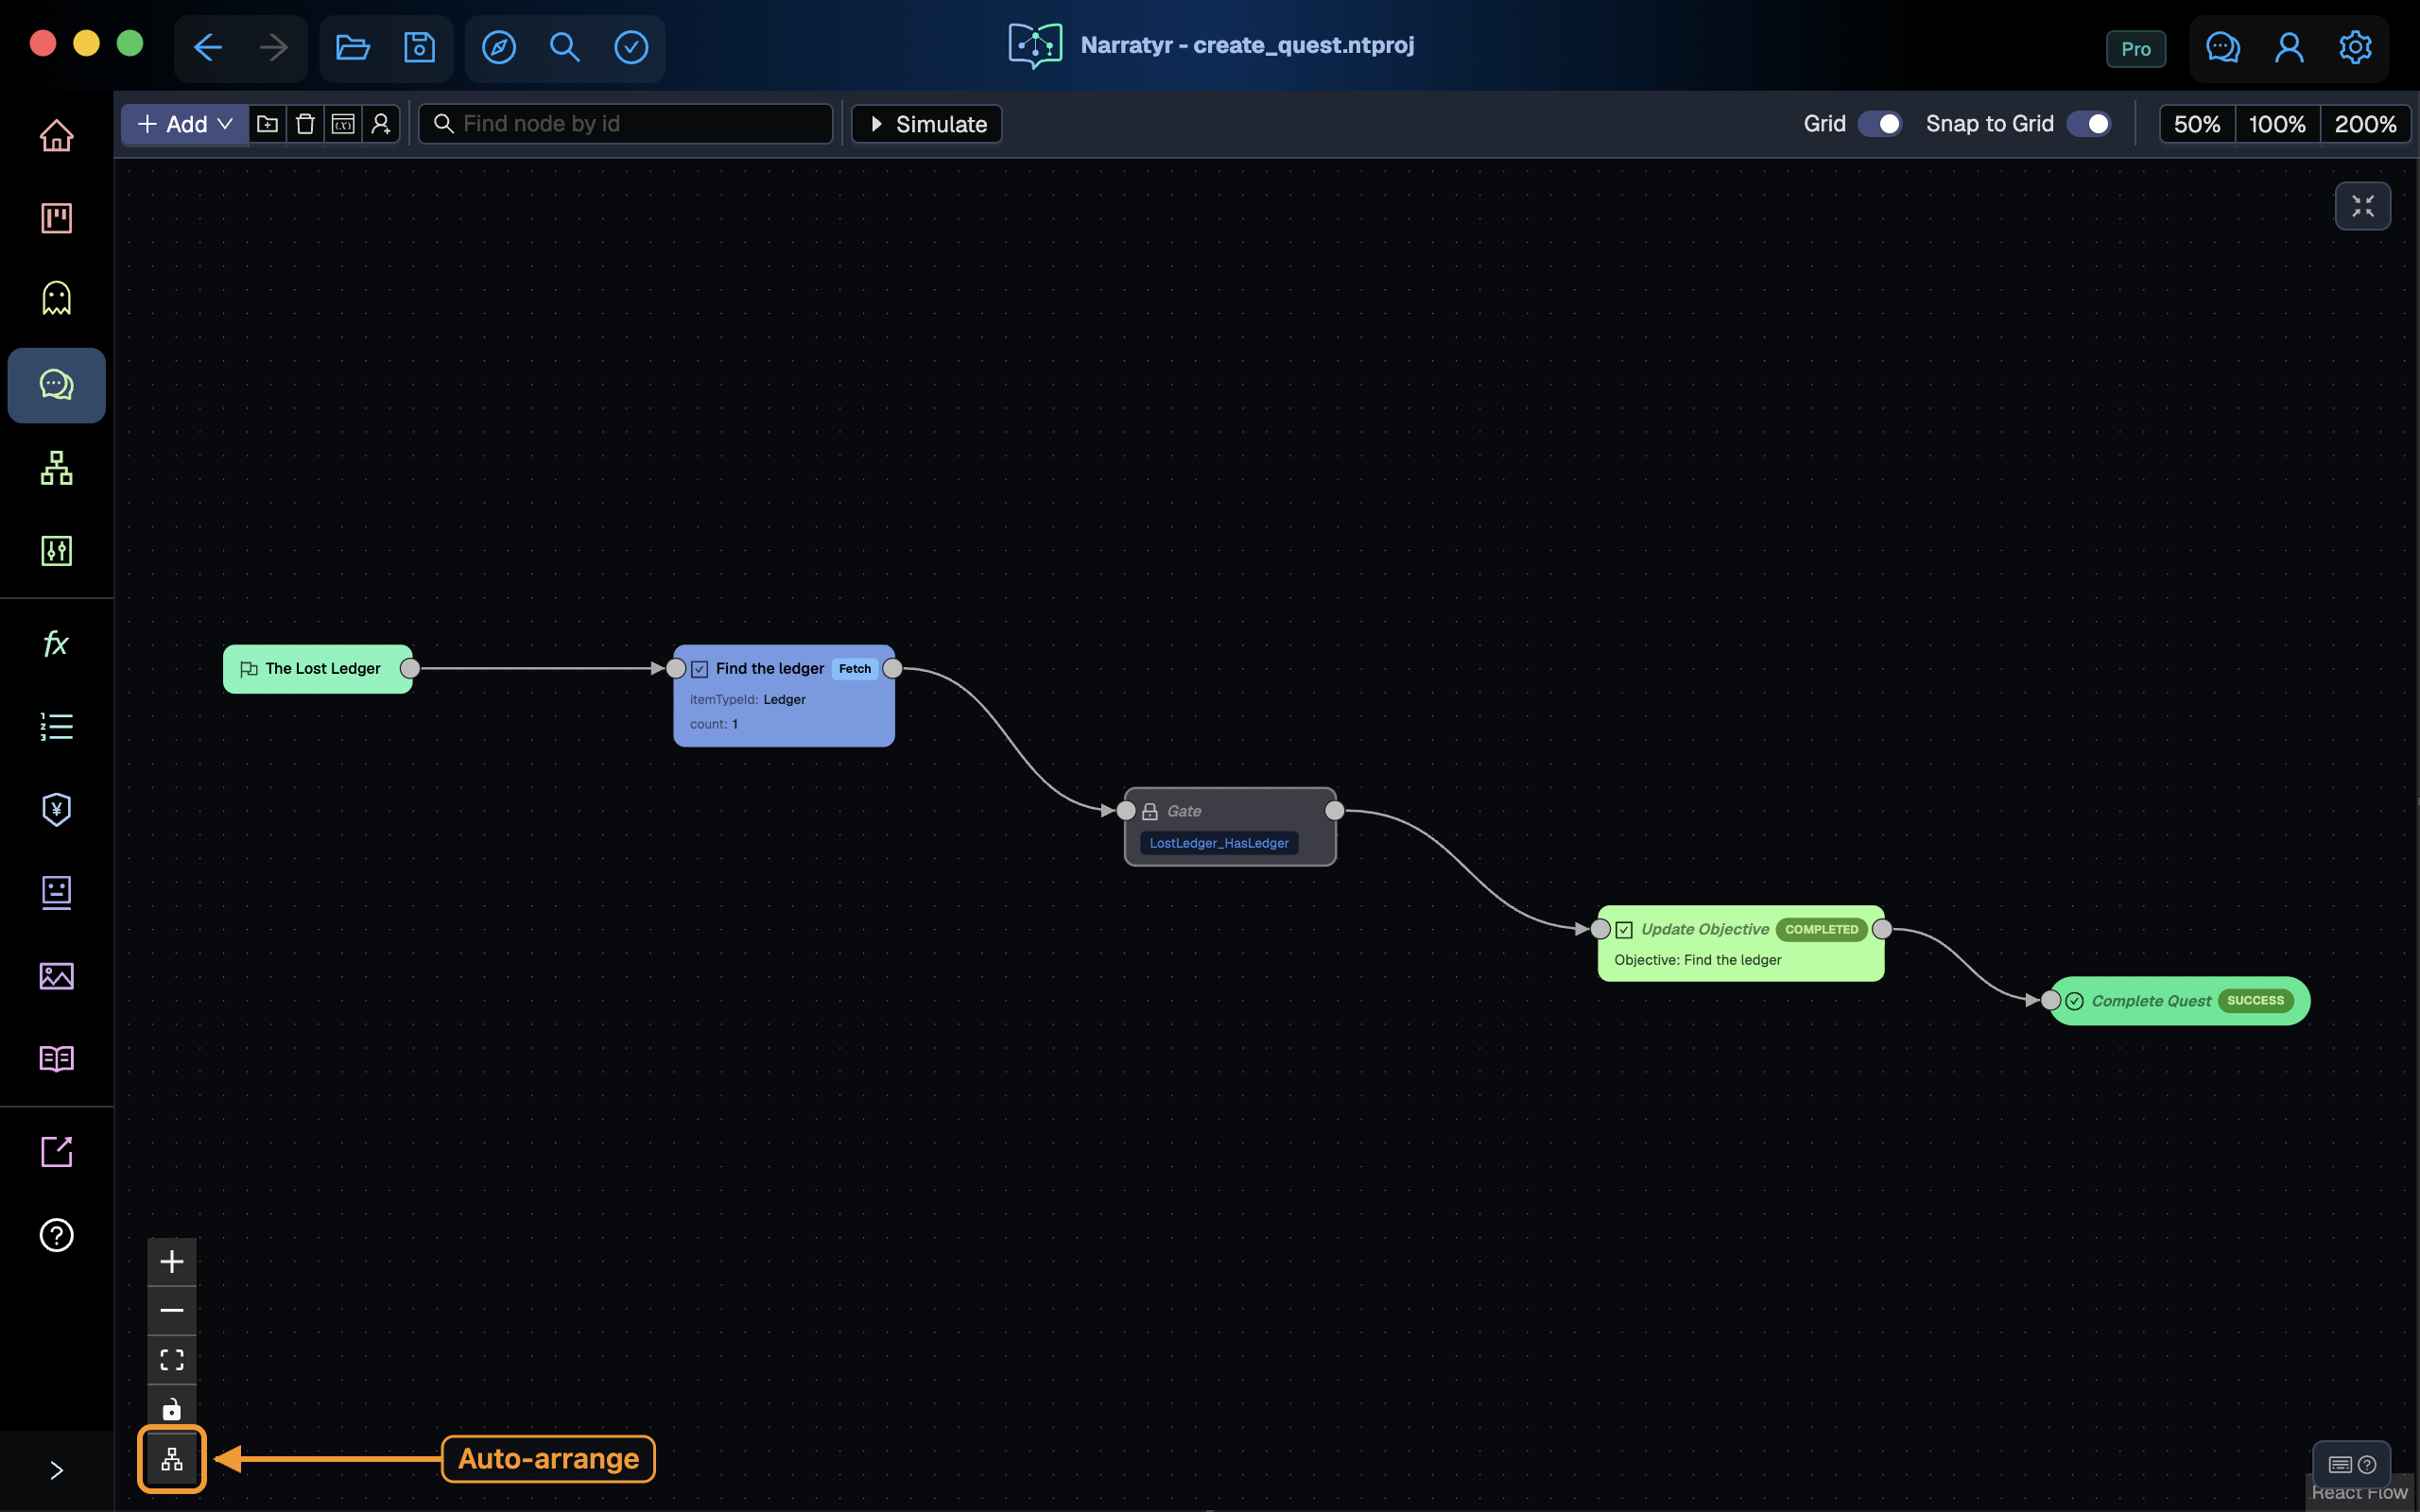
Select the last button on the lower-left toolbar to arrange the graph. You can also choose Auto Arrange from the canvas menu or press ⇧⌘A. The nearby frame button shows the complete graph.
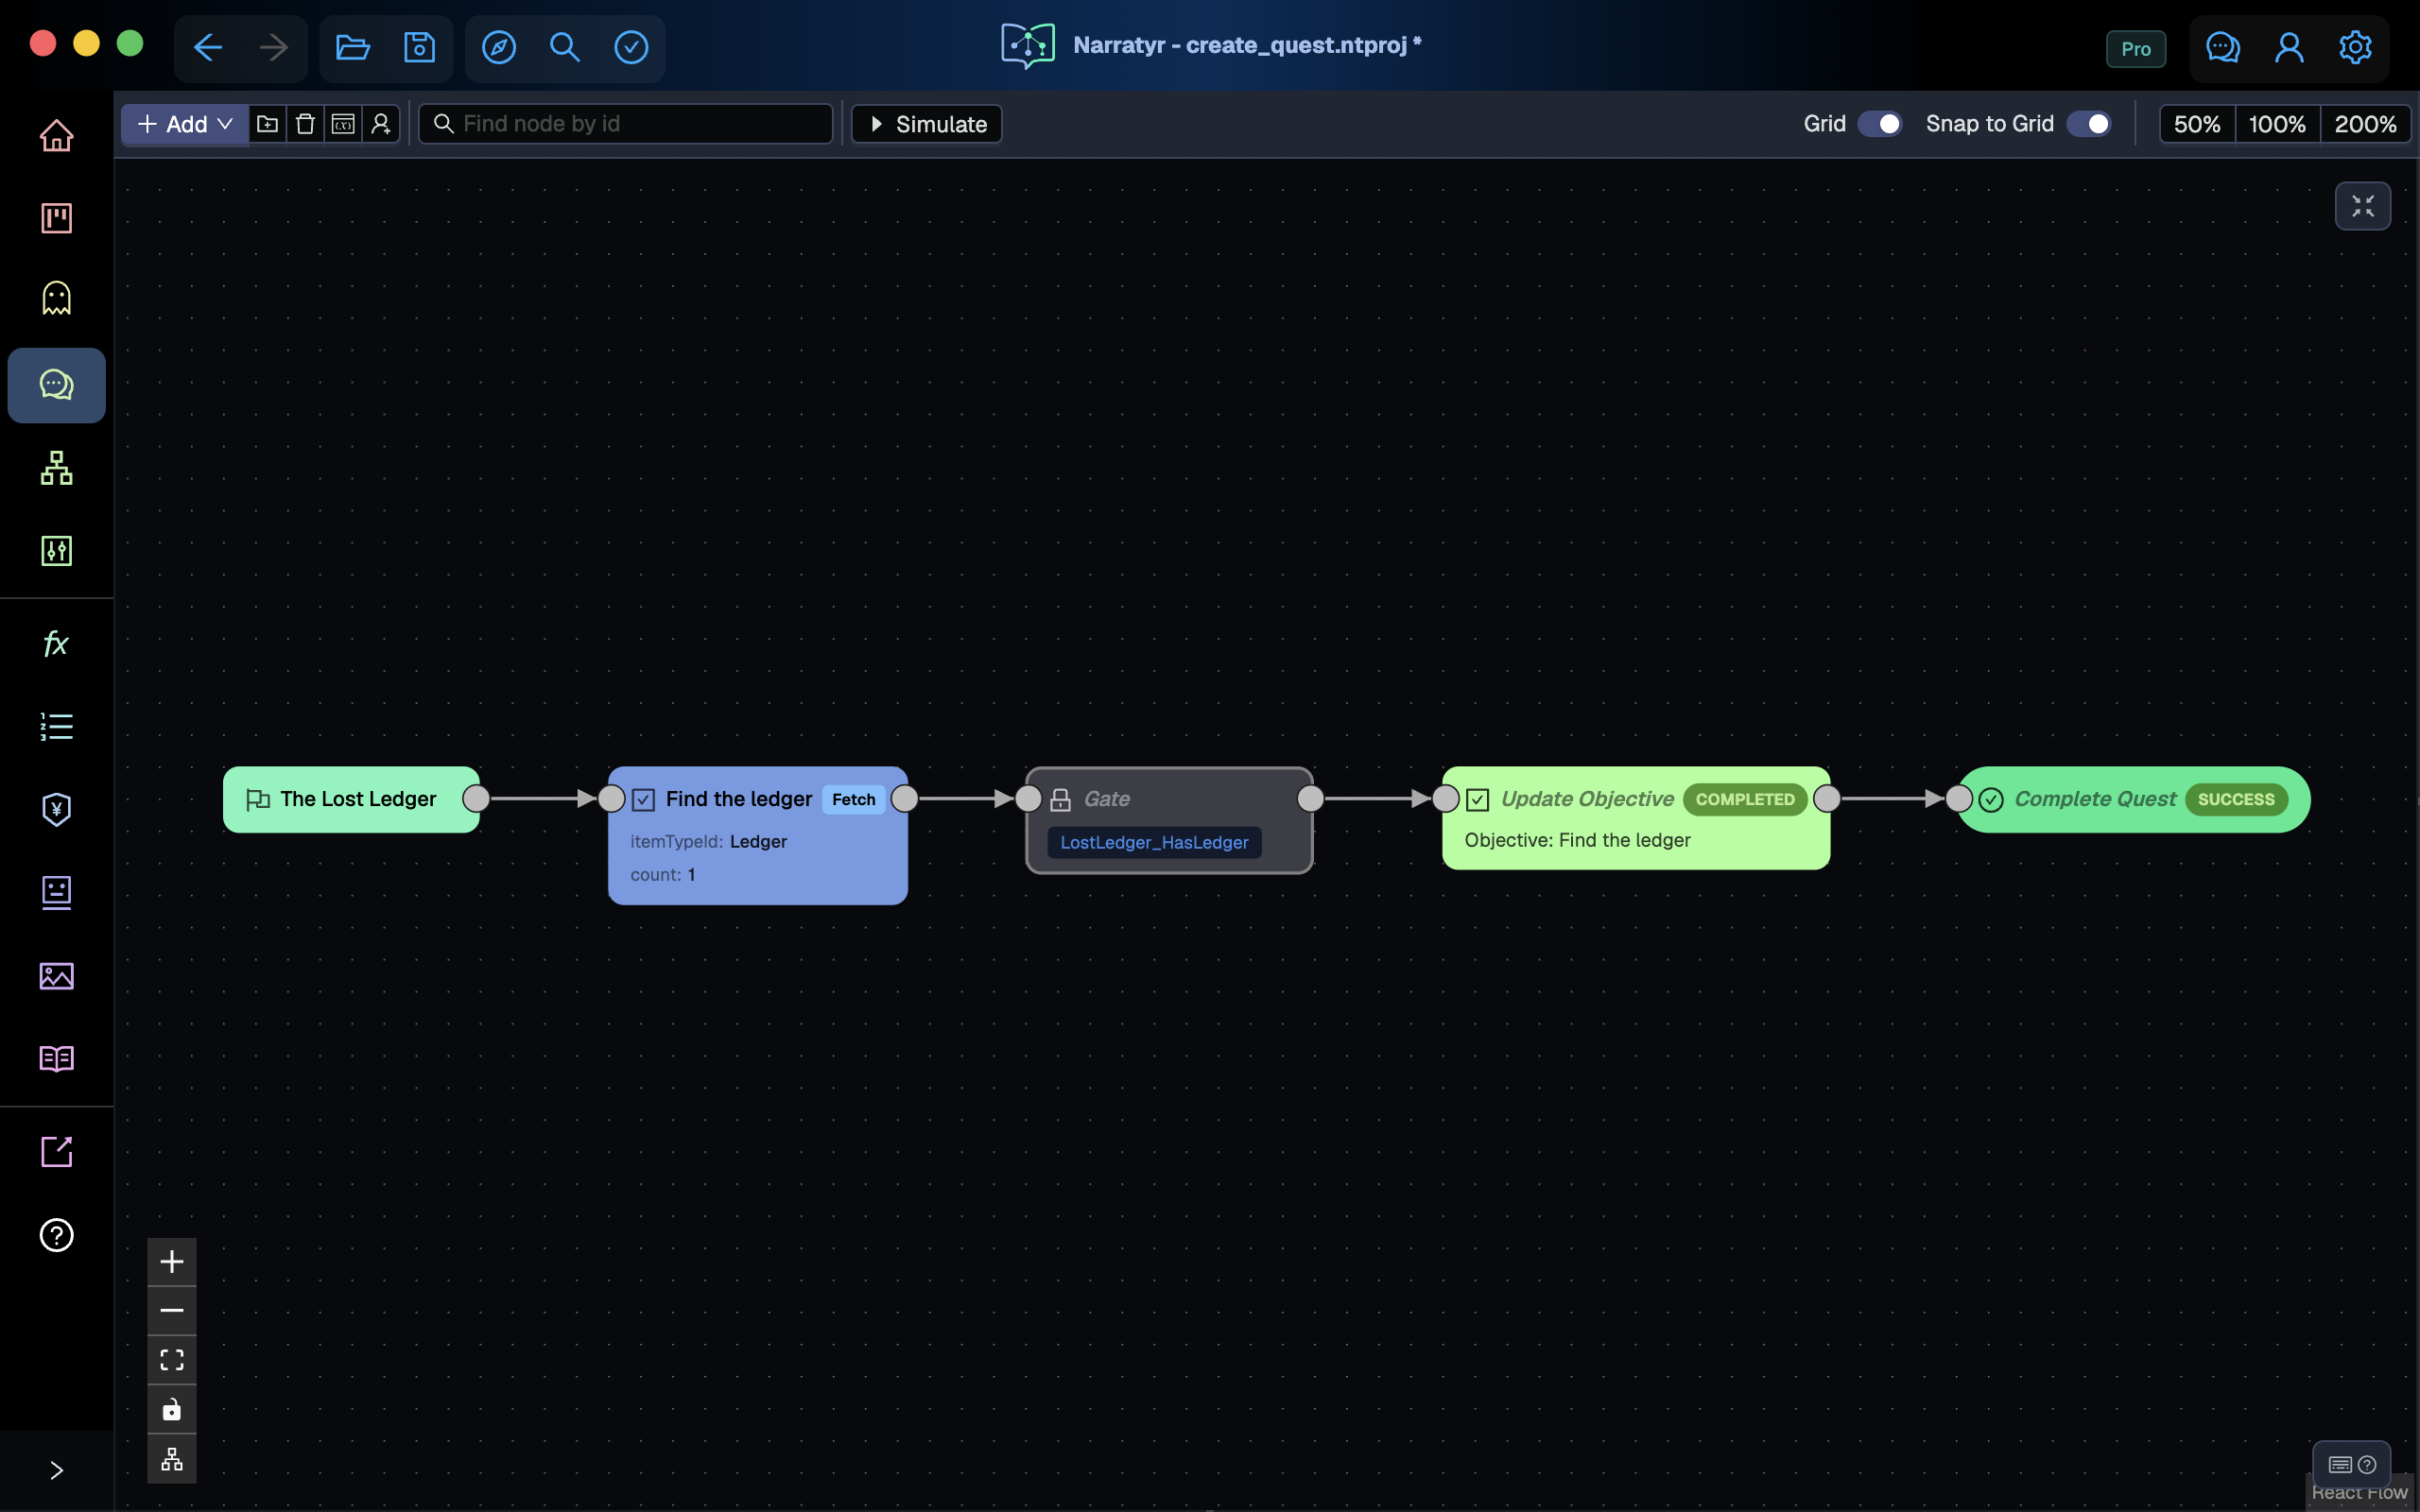
The runtime introduces the objective and waits at the Gate. After the game changes
LostLedger_HasLedger, the runtime completes the objective and quest.
Press ⌘S to save. An asterisk beside the project name indicates unsaved changes.
Next
Quests covers Hubs, Forks, Event Listeners, and Start Dialogue nodes. Variables and conditions explains the state read by a Gate, and Build a dialogue creates a conversation that can change quest state.